

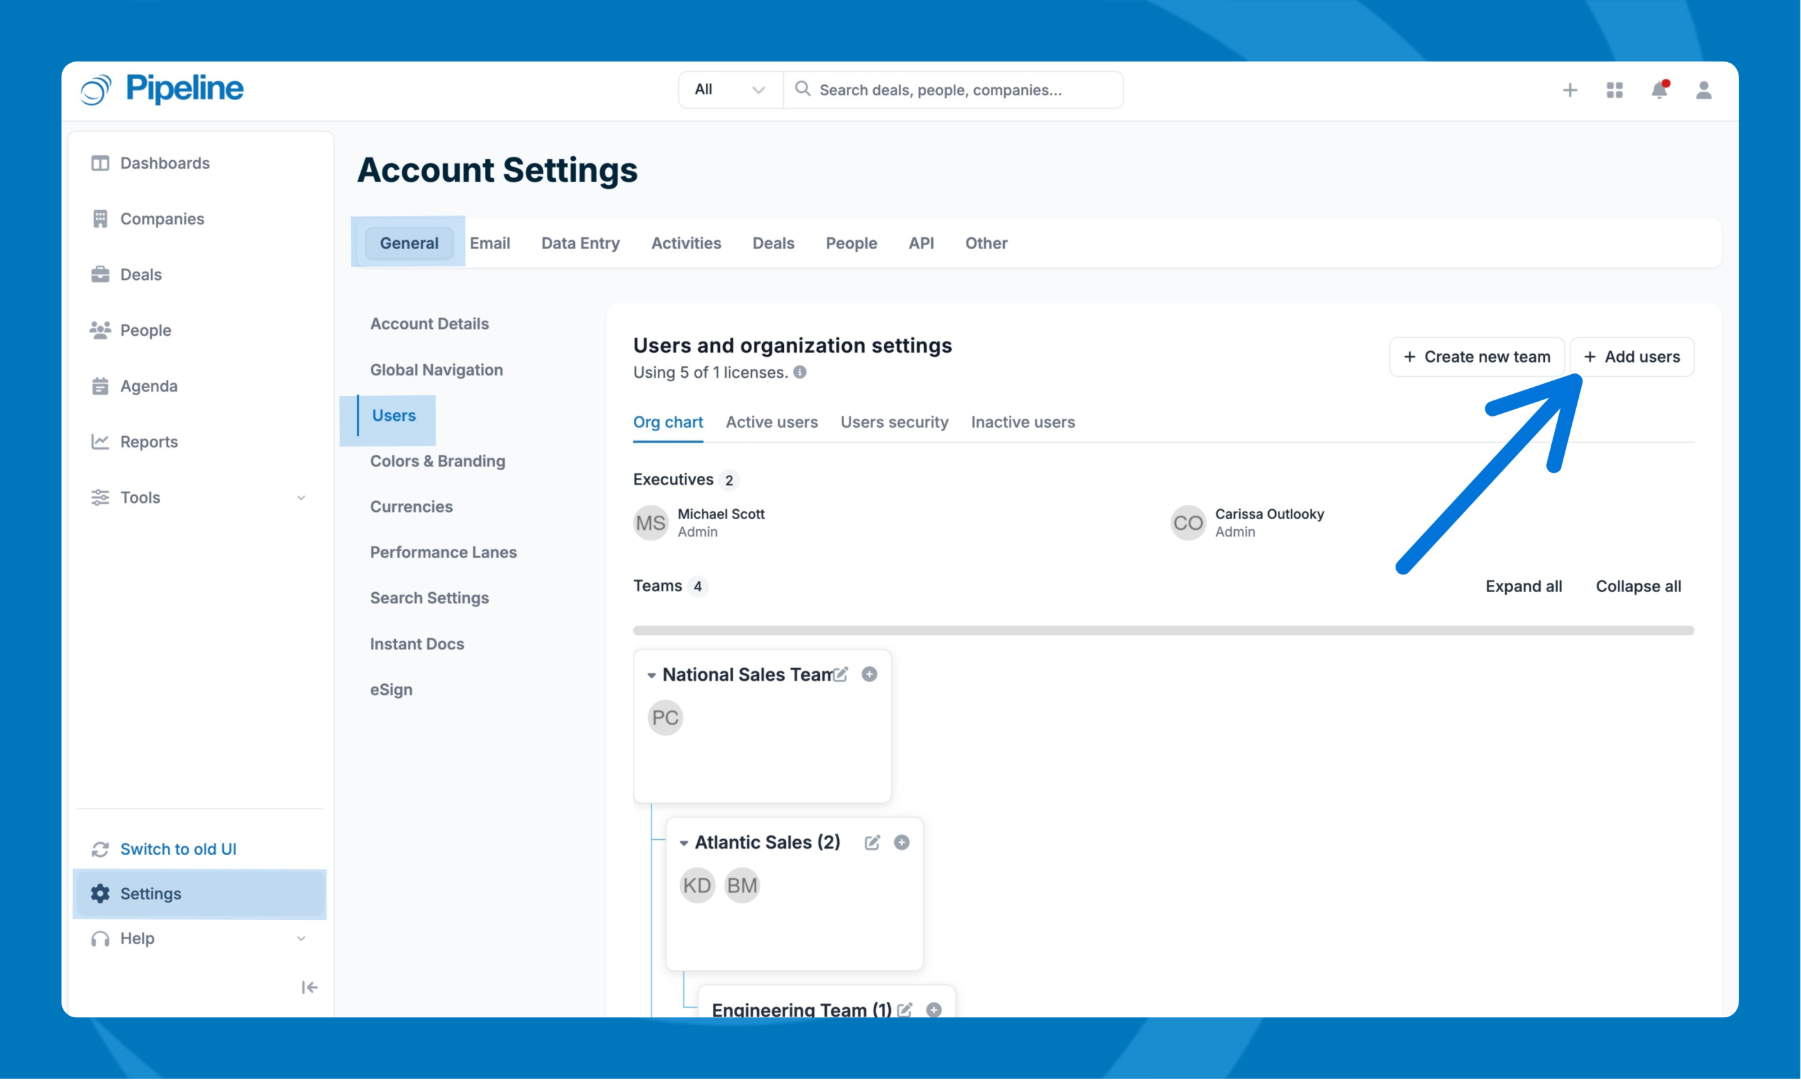
Adding a New User
Admins can add new users directly from the Users page in Account Settings.To add a new user:
- Go to Settings > General > Users.
- Click the + Add users button.
- Set the user’s name, email, role, team, and permissions.
- Save your changes.
User Roles
- Team Member (default):
- Access and edit data within their assigned team or account.
- Belongs to a team.
- Team Leader:
- Manage and edit data for their team or the whole account.
- Belongs to a team.
- Executives:
- Can see and edit all data across the account.
- Cannot belong to a team.
- Supershare
- SuperShare users can only view the deal list view and only have access to lists that have been shared with them.
Click here for more information on Supershare. - Cannot belong to a team.
- SuperShare users can only view the deal list view and only have access to lists that have been shared with them.
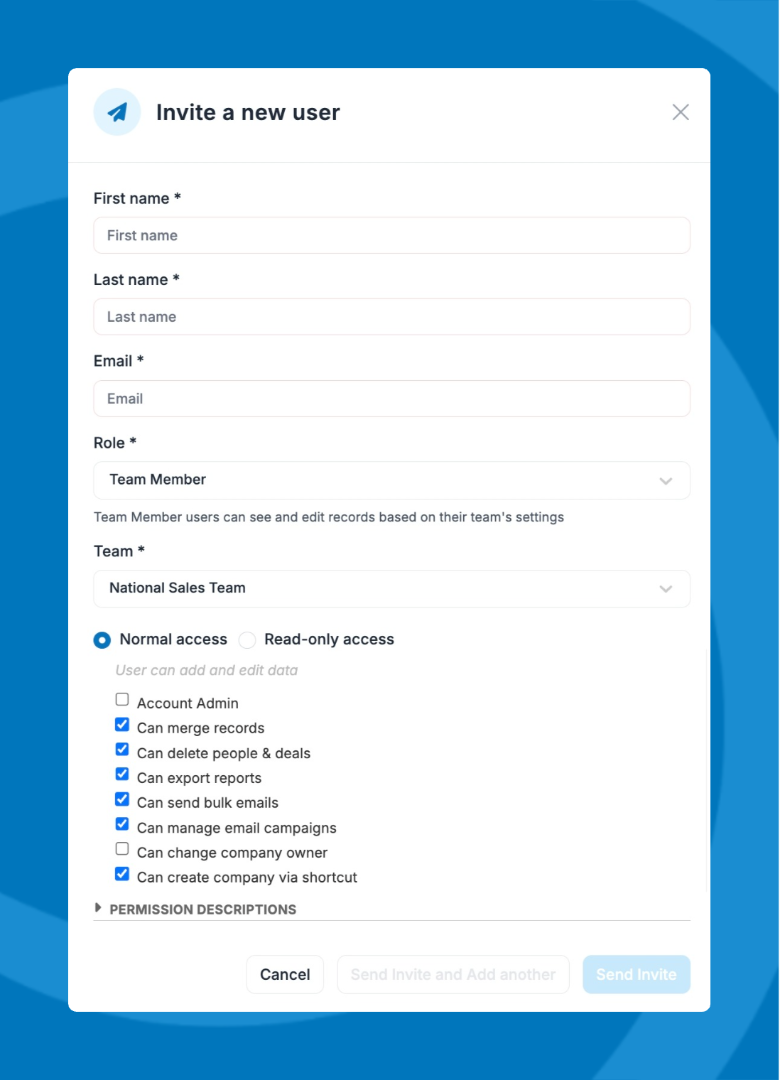
User Permissions
Set user permissions for each member:- Normal access: Add and edit data according to their role and team settings.
- Read-only access: View data and comment on team activities, but cannot add or edit records.
- Account Admin
- Can merge records
- Delete people & deals
- Export reports
- Can send bulk emails
- Can manage email campaigns (if enabled)
- Can change company owner
- Can create company via shortcut
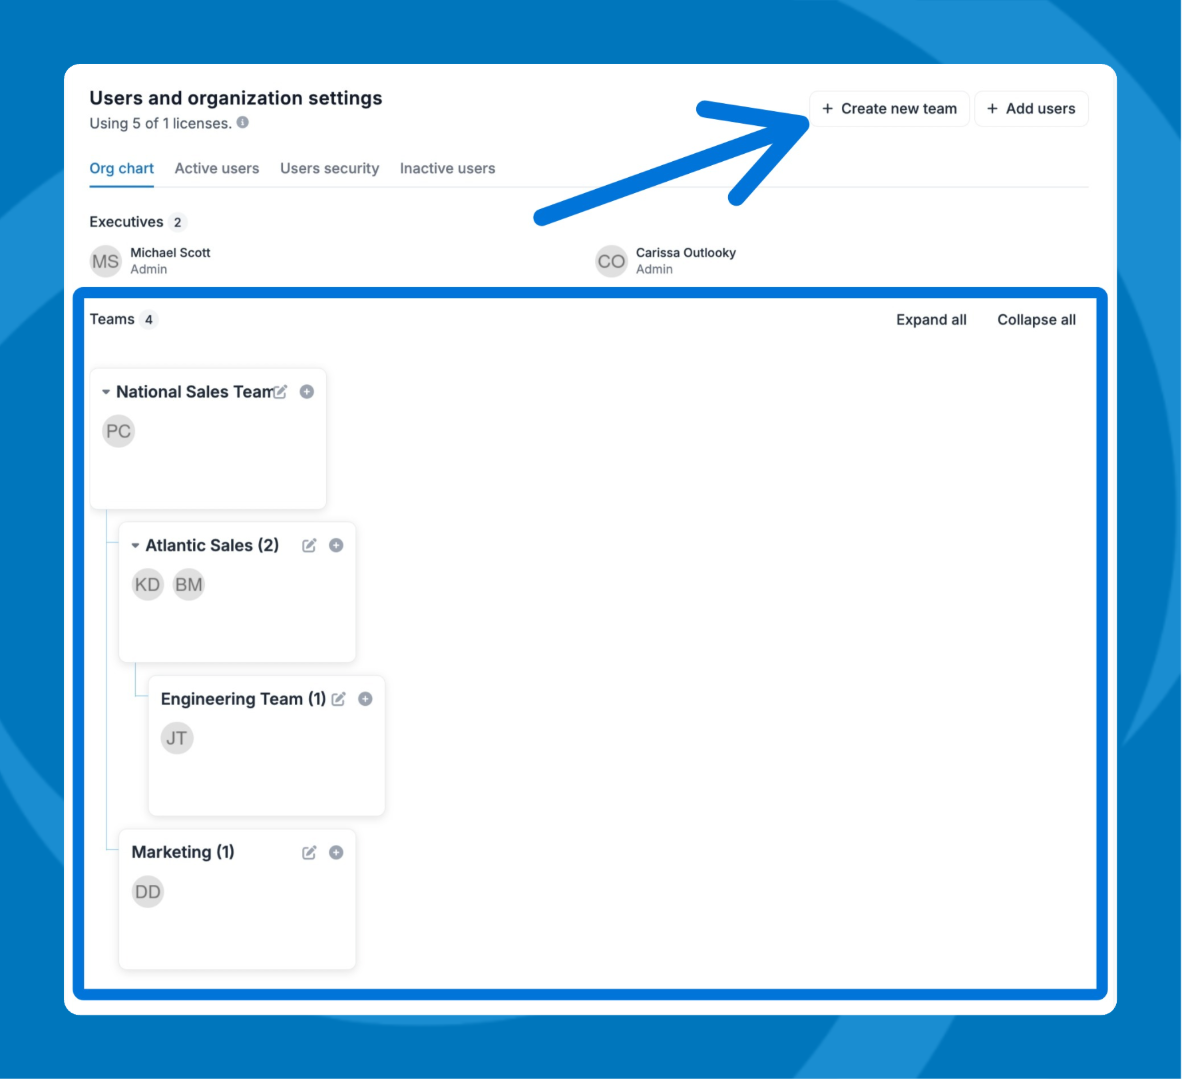
Teams
- The Team section visually displays your team structure.
- Expand all to view every team and their respective reporting lines.
- Click a team name to adjust team settings or add users.
- The number of teams you can add depends on your account's plan.
Active and Inactive Users
Active Users:- Listed in the Active Users tab.
- You can quickly review their Name, Team, Role, Email, Synced Email Status, whether they are an Admin or a Read-Only user, and their Last Login.
- Click a user’s name to update their details or permissions.
- Click the three dots to:
- Edit user
- Re-send invitation email
- Reassign data
- Mark as inactive

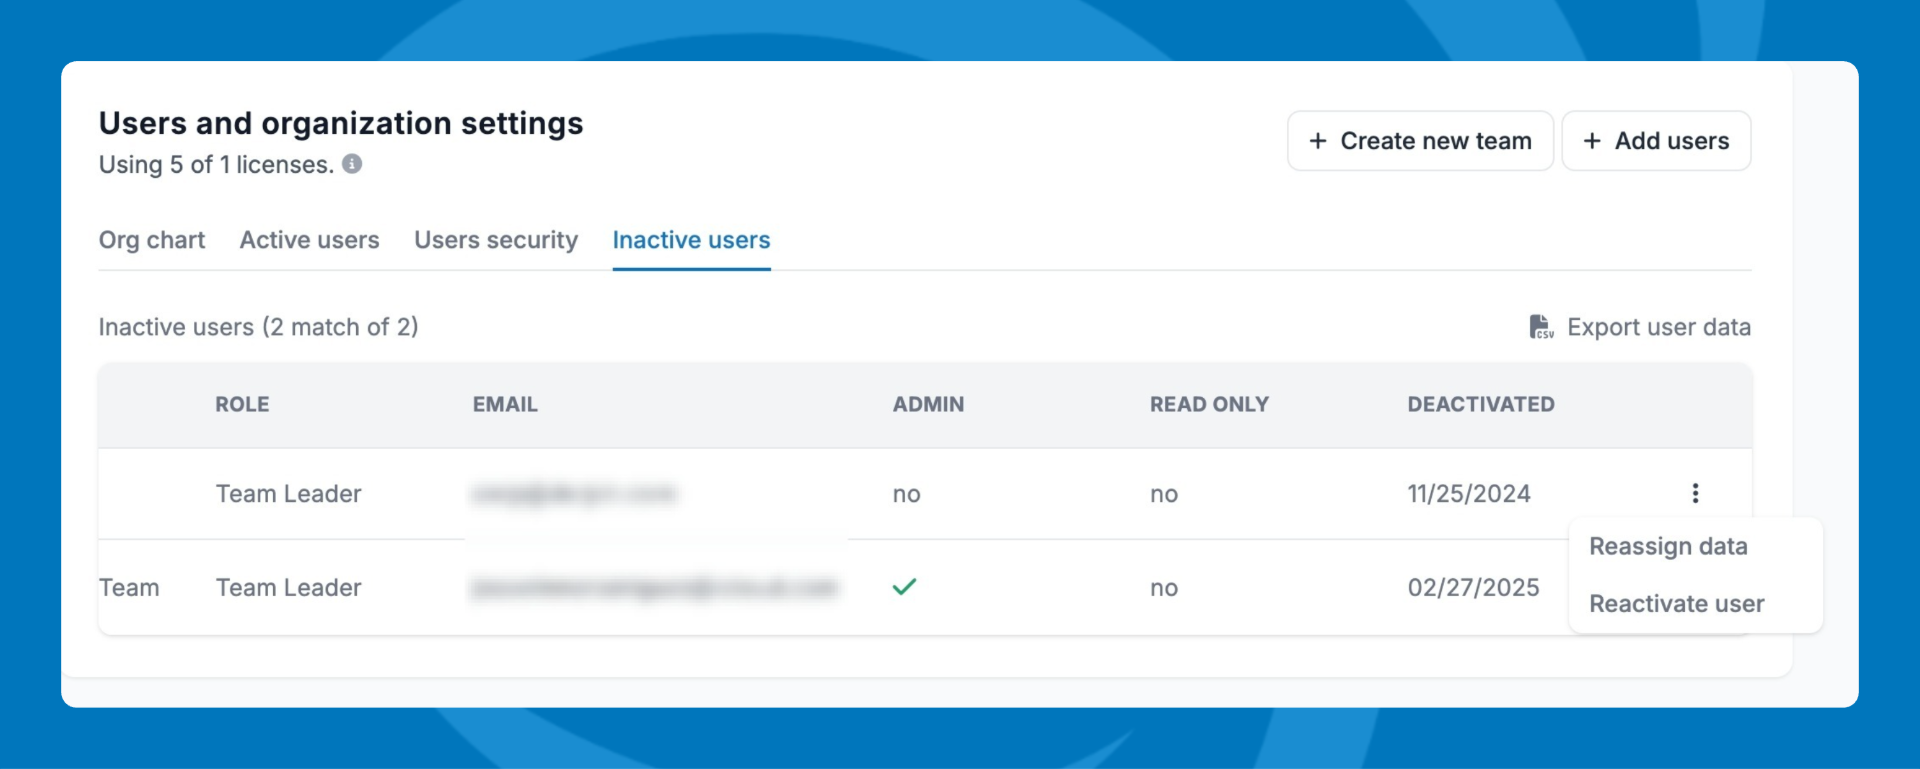
Inactive Users:
- Listed under the Inactive Users tab.
- You can quickly review their Name, Team, Role, Email, whether they were an Admin or a Read-Only user, and their Deactivated date.
- Data remains visible to the team until reassigned.
- Reassigned data includes: companies, people, deals, and incomplete tasks/events.
- Won/lost deals and completed activities remain with the inactive user for accurate records.
- To reactivate, click the three dots and select 'Reactivate User'.
You can click on "Export User Data" to download a CSV with all user data.
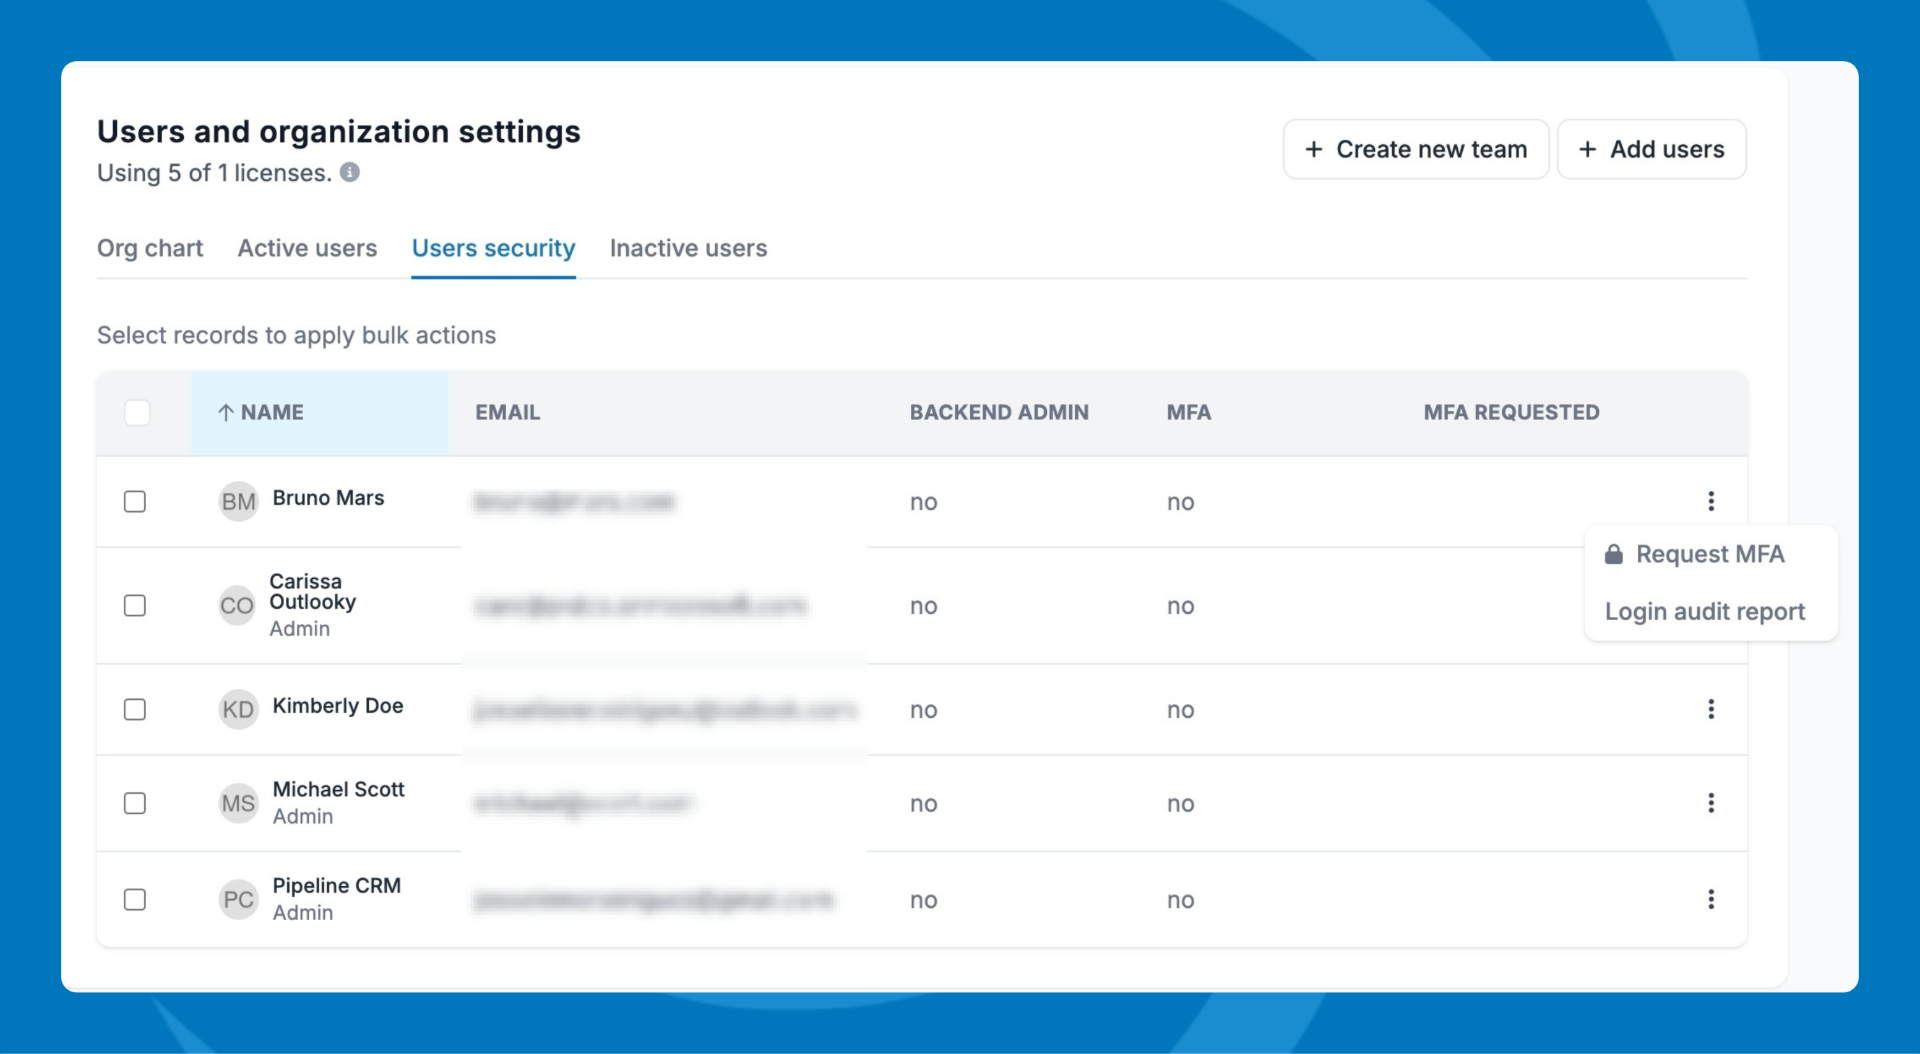
Users Security
- Instantly see who’s protected by multi-factor authentication (MFA) and who still needs to set it up.
- If MFA is missing, you’ll know if it’s been requested.
- To boost security, click the three dots next to a user to prompt them to enable MFA or view a report of their logins.
Frequently Asked Questions
Q: What happens to an inactive user’s data if I reassign it immediately?A: Completed activities remain under the original user. Outstanding tasks and reassigned records move to the new owner.
Q: What if I wait to reassign an inactive user’s data?
If you prefer to reassign data later, navigate to the Inactive Users tab, click the three dots next to the user, and select 'Reassign Data' when you’re ready.
Q: What’s the best way to replace a user?
A: Mark the current user inactive first, then invite the new user. Reassign data as needed to ensure accurate records.
Q: Will a user know they’ve been marked inactive?
A: They lose access immediately and will see the login screen if they try to sign in. No notification is sent.
If you have questions or need assistance, reach out to our support team at [email protected].