

Before you start: Activity categories are managed by an admin in Account Settings > Activity Categories.
The Three Types
- Tasks — To-do items you need to complete. A due date is optional. Tasks have an open/completed status so you can track what's done.
- Events — Scheduled calendar items with a required start and end time (e.g., a meeting from 1–2 PM Thursday). Events also have an open/completed status.
- Activities — Records of interactions that have already happened (calls, emails, site visits, etc.). Logged after the fact via the Activity Feed on any record profile.
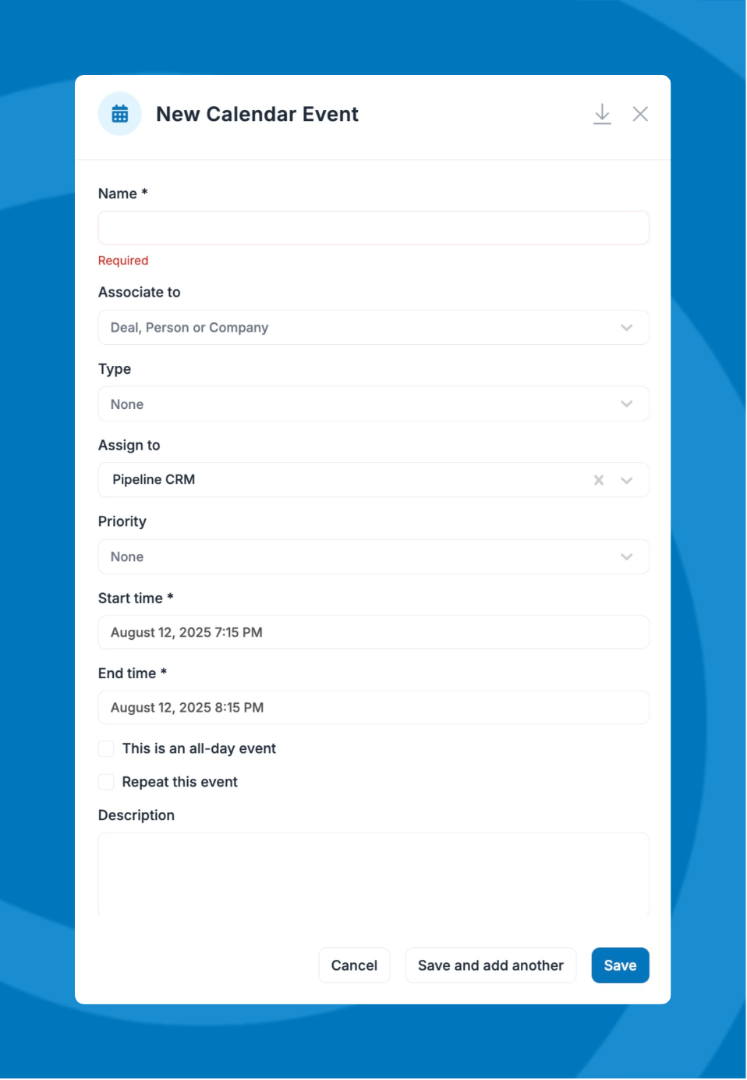
Create a Task or Event
- Click the + icon in the top navigation bar — or open the Agenda tile on any record profile — or go to the Agenda tab in the main navigation.
- Select Task or Event.
- Enter a name and associate it with one or more records (company, deal, or person).
- Assign a category, owner, priority, and timing.
- Add a description or notes if needed, then save.
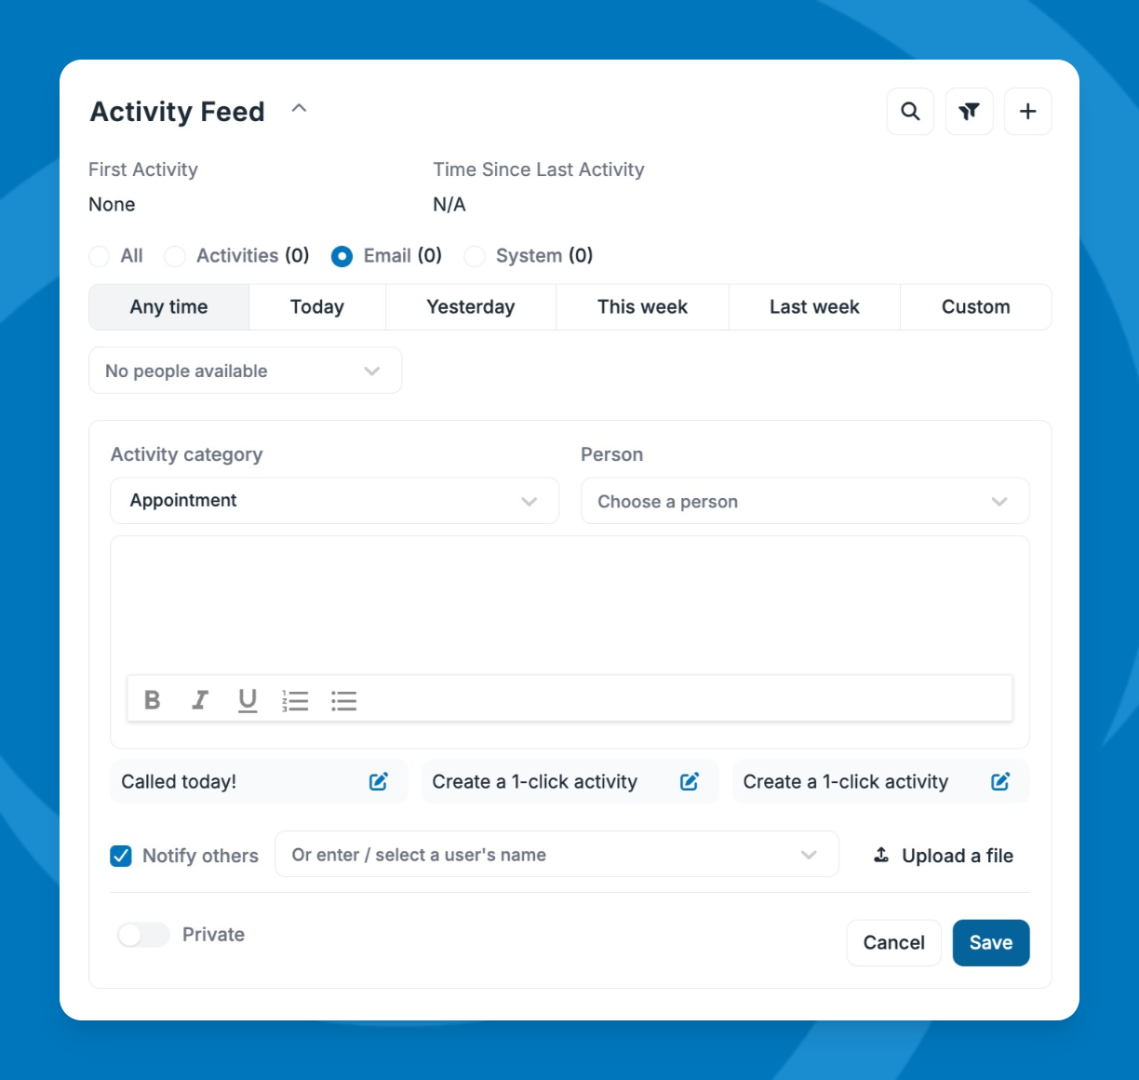
- Open the relevant company, deal, or person profile.
- Click the Activity Feed tile.
- Select a category and fill in the details.
- Associate the activity with any related records and optionally notify team members.
- Save the activity.
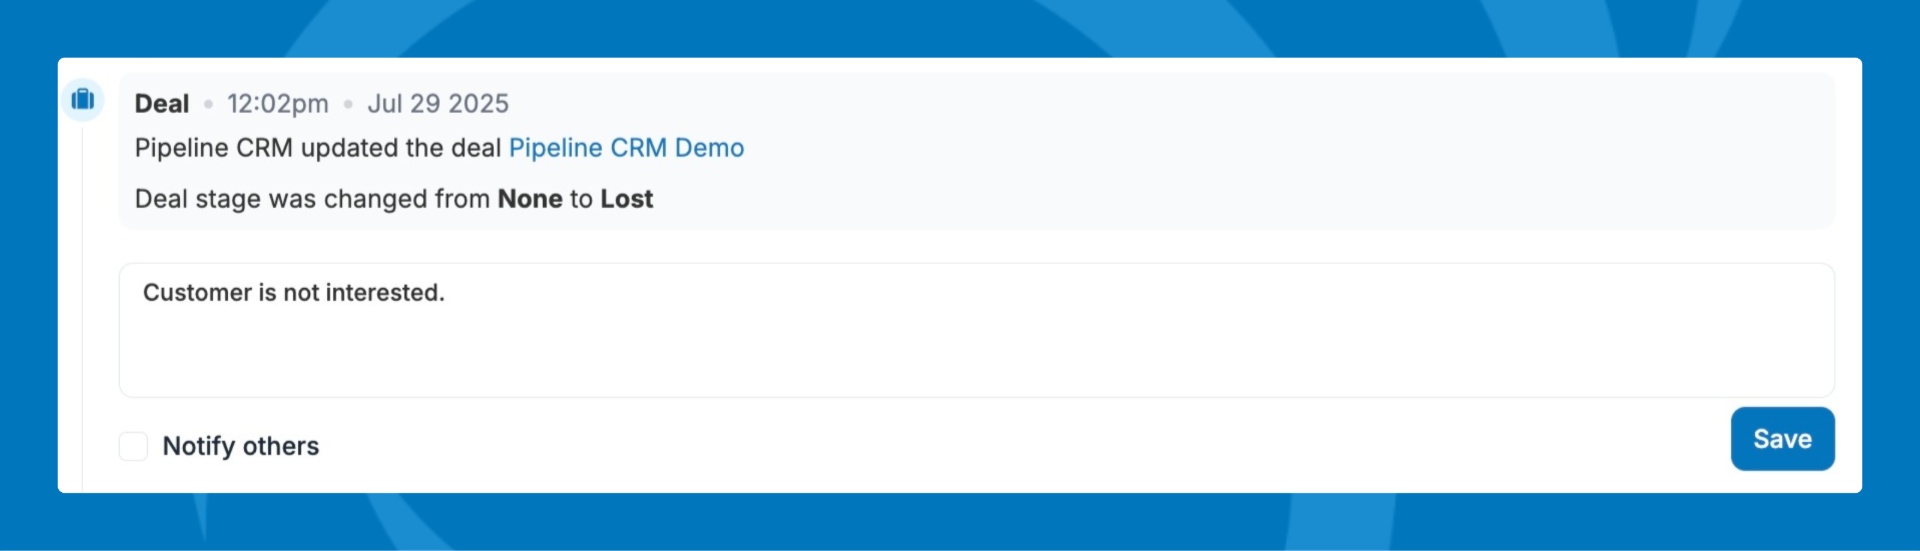
💡 Tip: If you have access to another user's records, you can comment on their activity notes by clicking on the activity.
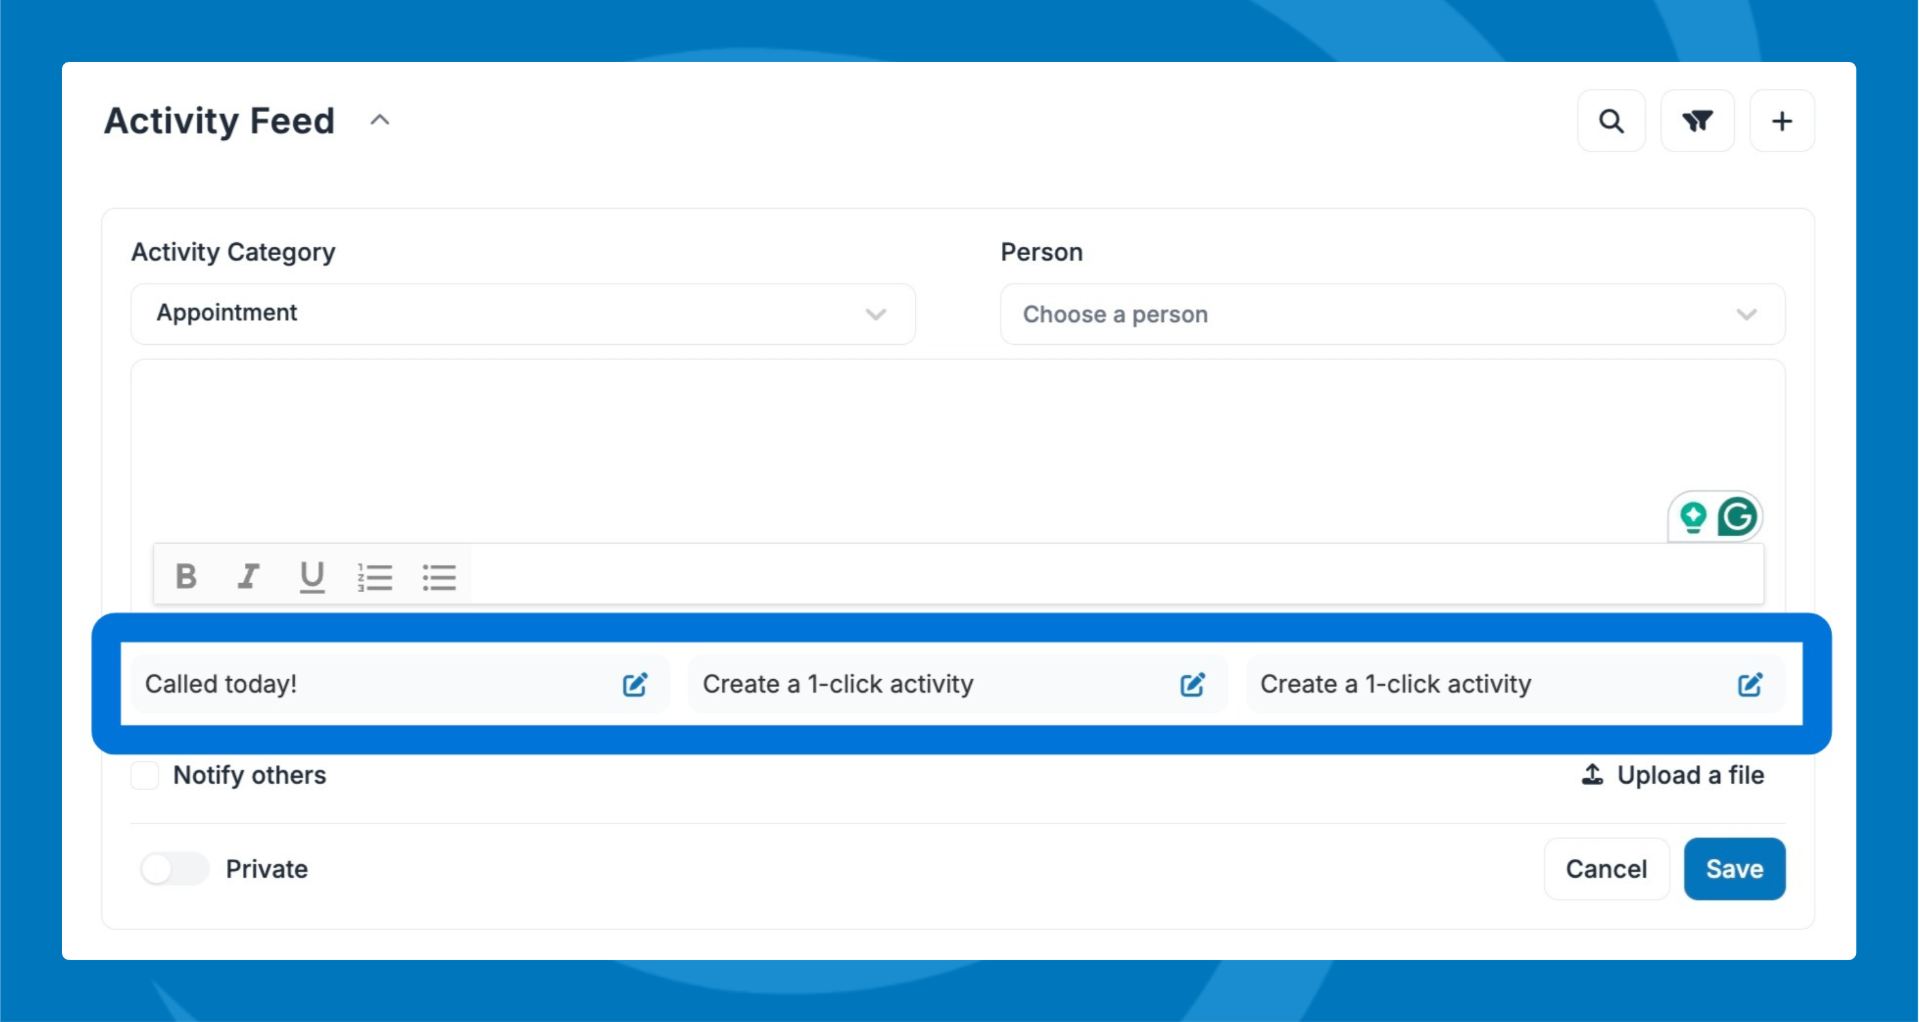
Save Time with One-Click Activity Notes
Set up template responses for common actions to log activities faster.
- Go to an activity category and create a note template (e.g., "Called, left a voicemail").
- Save it as a one-click note.
- Select it next time you need to log that action.
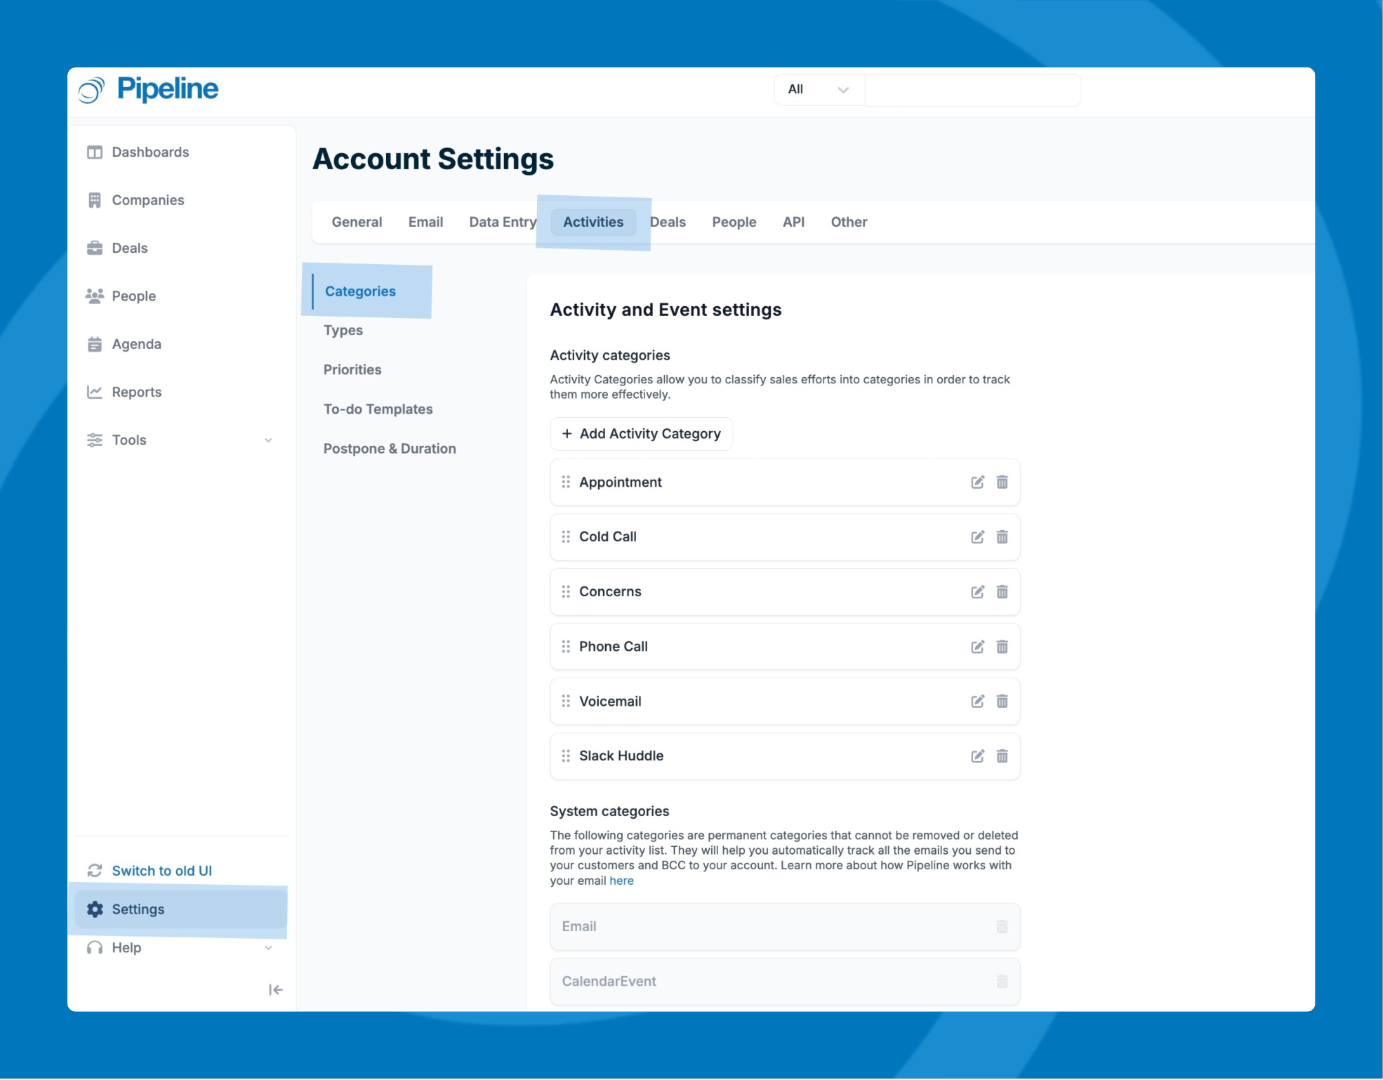
Manage Activity Categories
Categories help you organize and report on your sales efforts.
- Click Settings in the lower-left corner.
- Select the Activities tab, then click Categories.
- Create or edit categories as needed.
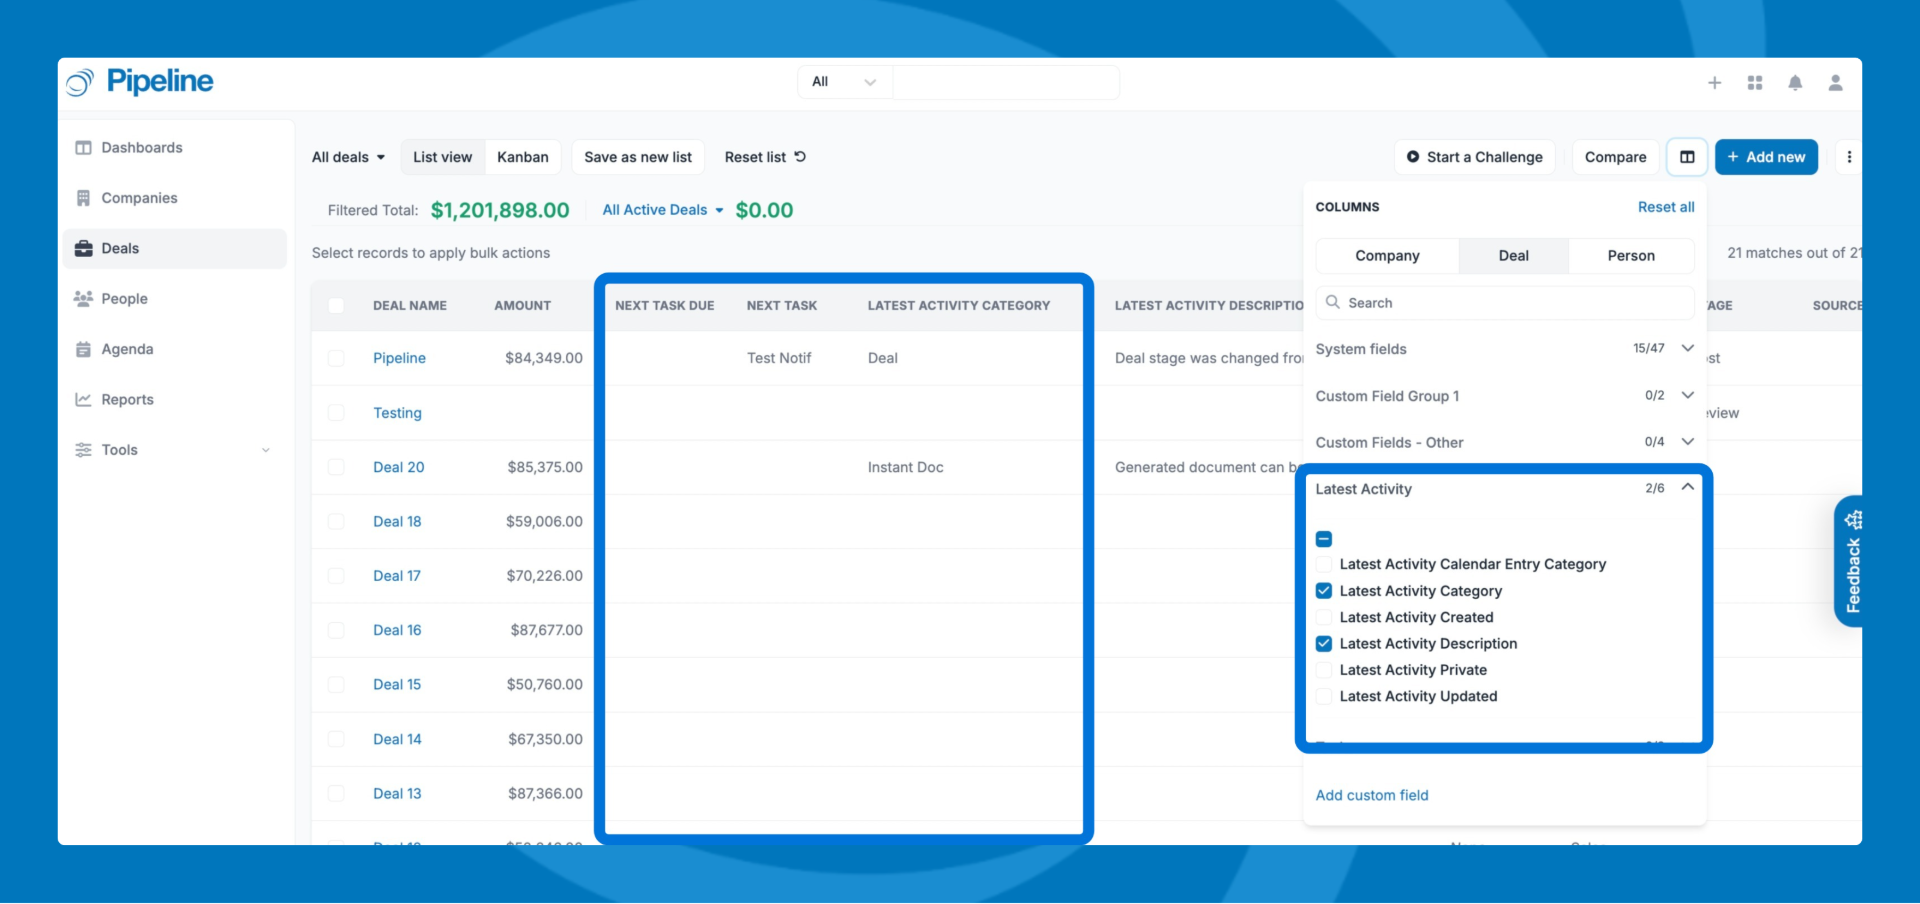
Working from List Views
Stay on top of your workload with list views:Tasks
- View your next due task and its date.
- Mark as complete, postpone, or edit with a single click.
- See your latest activity and when it was updated.
- Add new activities or review past ones.
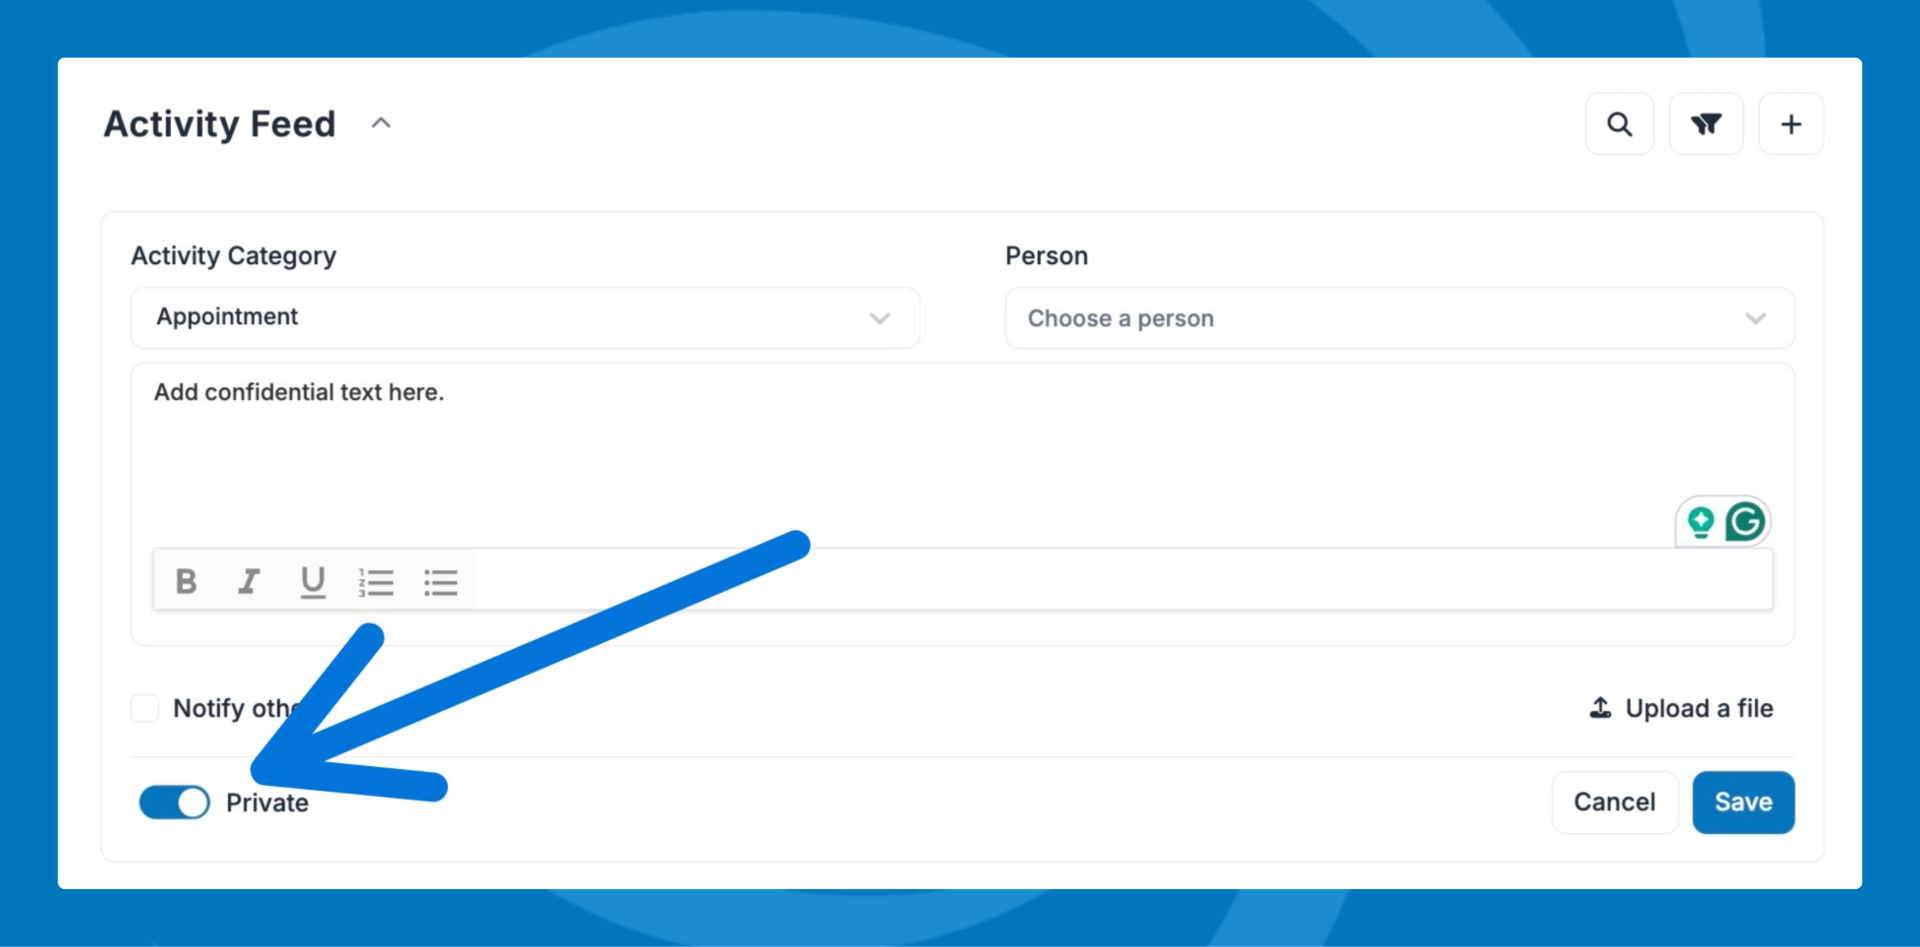
Use Private Activities
Private activities let administrators and executives document sensitive notes without sharing them with basic users.
⚠️ Note: Private activities are available on the Grow plan only.
- When logging an activity, toggle Private on before saving.
- To make an existing note private, open it, click Edit, and select Make Private.
To monitor your progress, use the Activity Scoreboard and Activity Report under the Reports tab.
- Click here for more information on using the Activity Scoreboard.
- Click here for more information on using the Activity Report.