

Why Schedule Emails?
Scheduling emails gives you flexibility and ensures your messages reach recipients at the perfect moment. Whether you’re planning follow-ups, announcements, or campaigns, Pipeline CRM makes it easy.How to Schedule an Email
- Compose Your Email
- Open the email composition window.
- Write your message, add recipients, and include any attachments.
- Access Scheduling Options
- Click the arrow next to the Send Now button.
- Select Schedule for later from the dropdown.
- Set the Date and Time
- Choose when you want your email sent.
- Click Save to confirm.
- Finalize Scheduling
- Click Send Later to schedule your email.
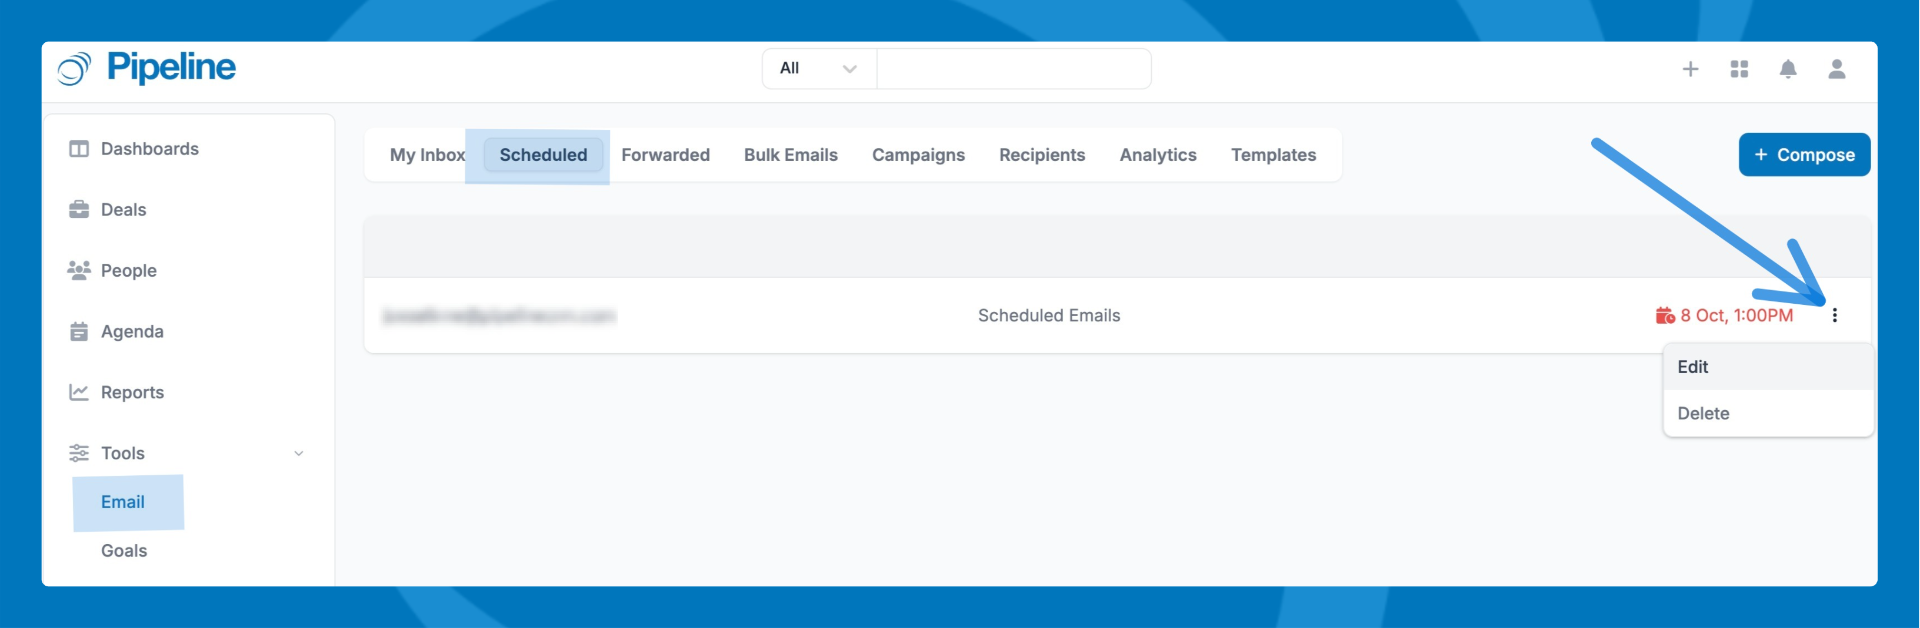
Managing Scheduled Emails
- View Scheduled Emails
- Go to the Email tab in your dashboard.
- Find your pending emails under the Scheduled section.
- Edit or Delete Scheduled Emails
- Click the email’s name for a preview.
- Choose Edit to update the content or change the send time.
- Select Delete to cancel sending.
Additional Tips & Considerations
- Email Campaigns
- Turning off a campaign will cancel any scheduled emails linked to it.
- To resume, toggle the campaign back on.
- Bulk Emails
- You can schedule bulk emails as well.
- Check their status in each contact’s Activity Feed or the Bulk Email section under the Email tab.