
Key Benefits
- Locate contacts and leads instantly on an interactive map.
- Plan efficient routes by selecting multiple destinations and letting Pipeline CRM calculate the fastest path.
- Manage sales territories and avoid overlapping visits.
- Use geographic insights to target underserved areas and allocate resources smartly.
- Boost customer satisfaction with regular, timely visits.
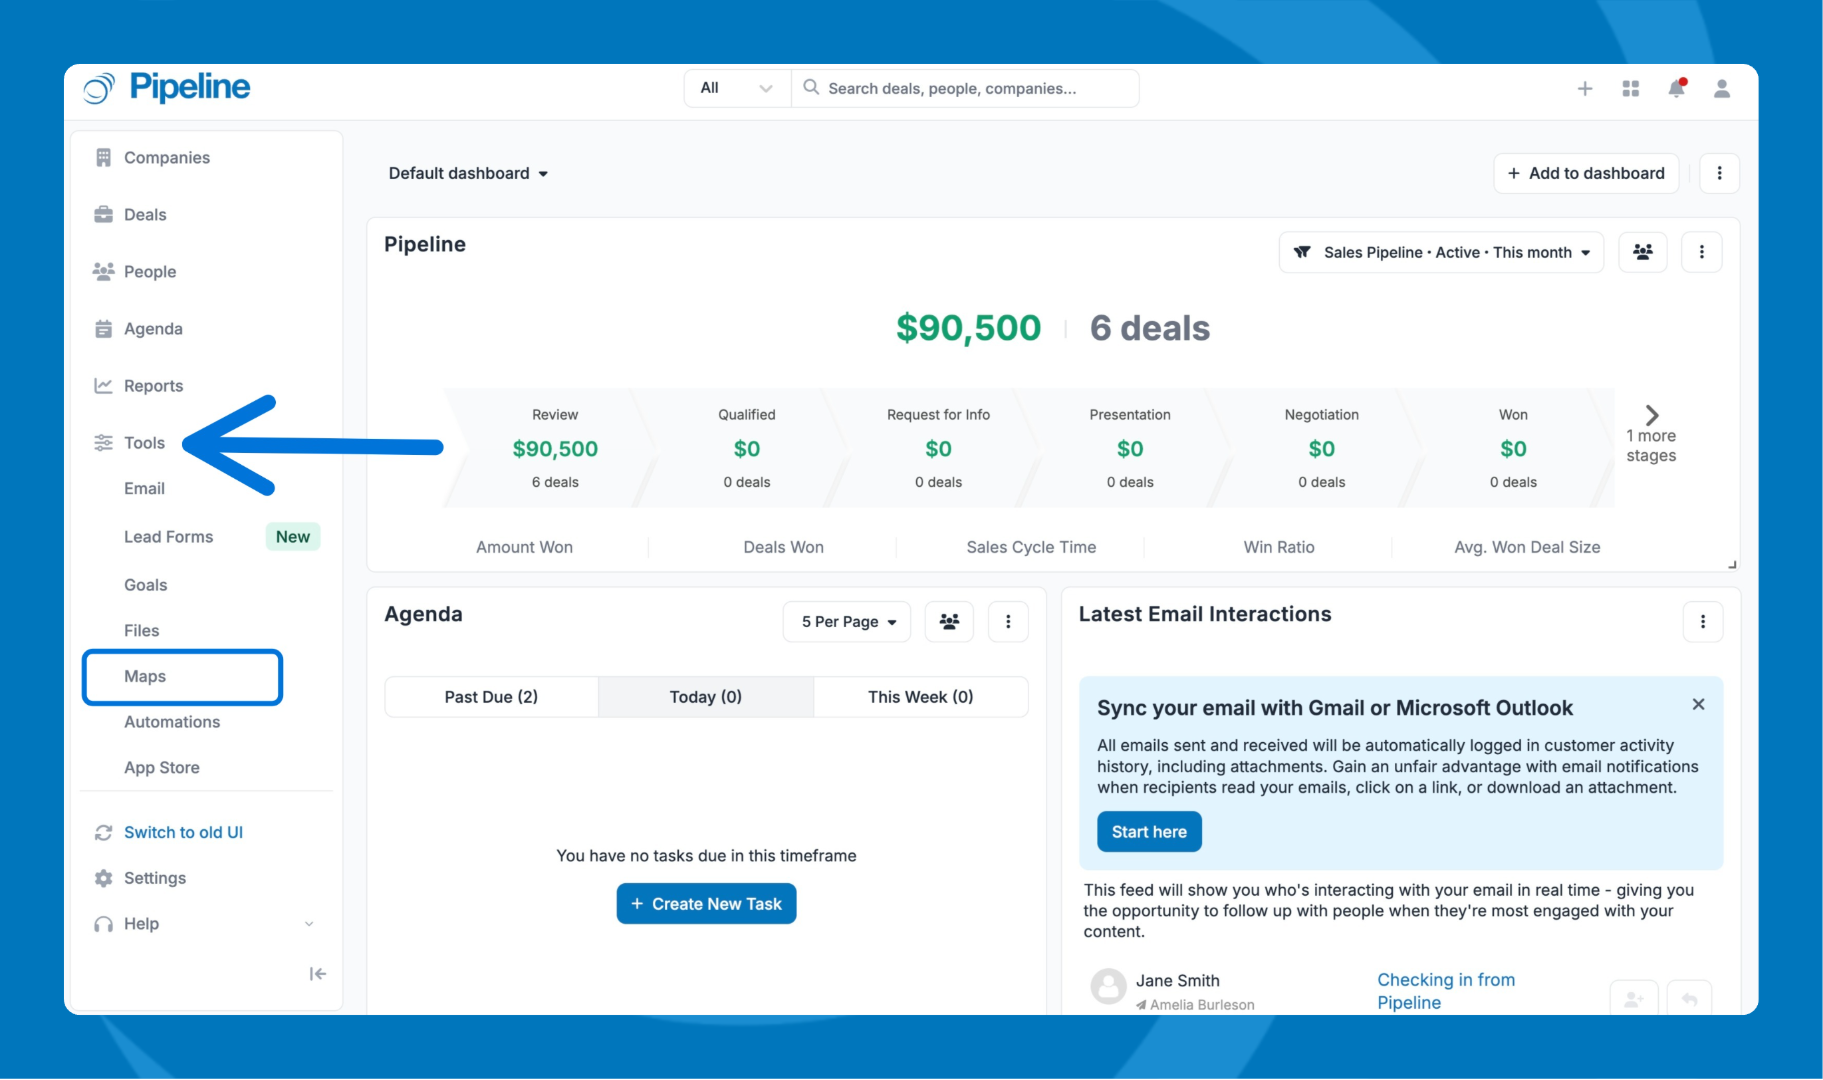
How to Access Map Views
Click on Tools in the left menu and then choose Maps.
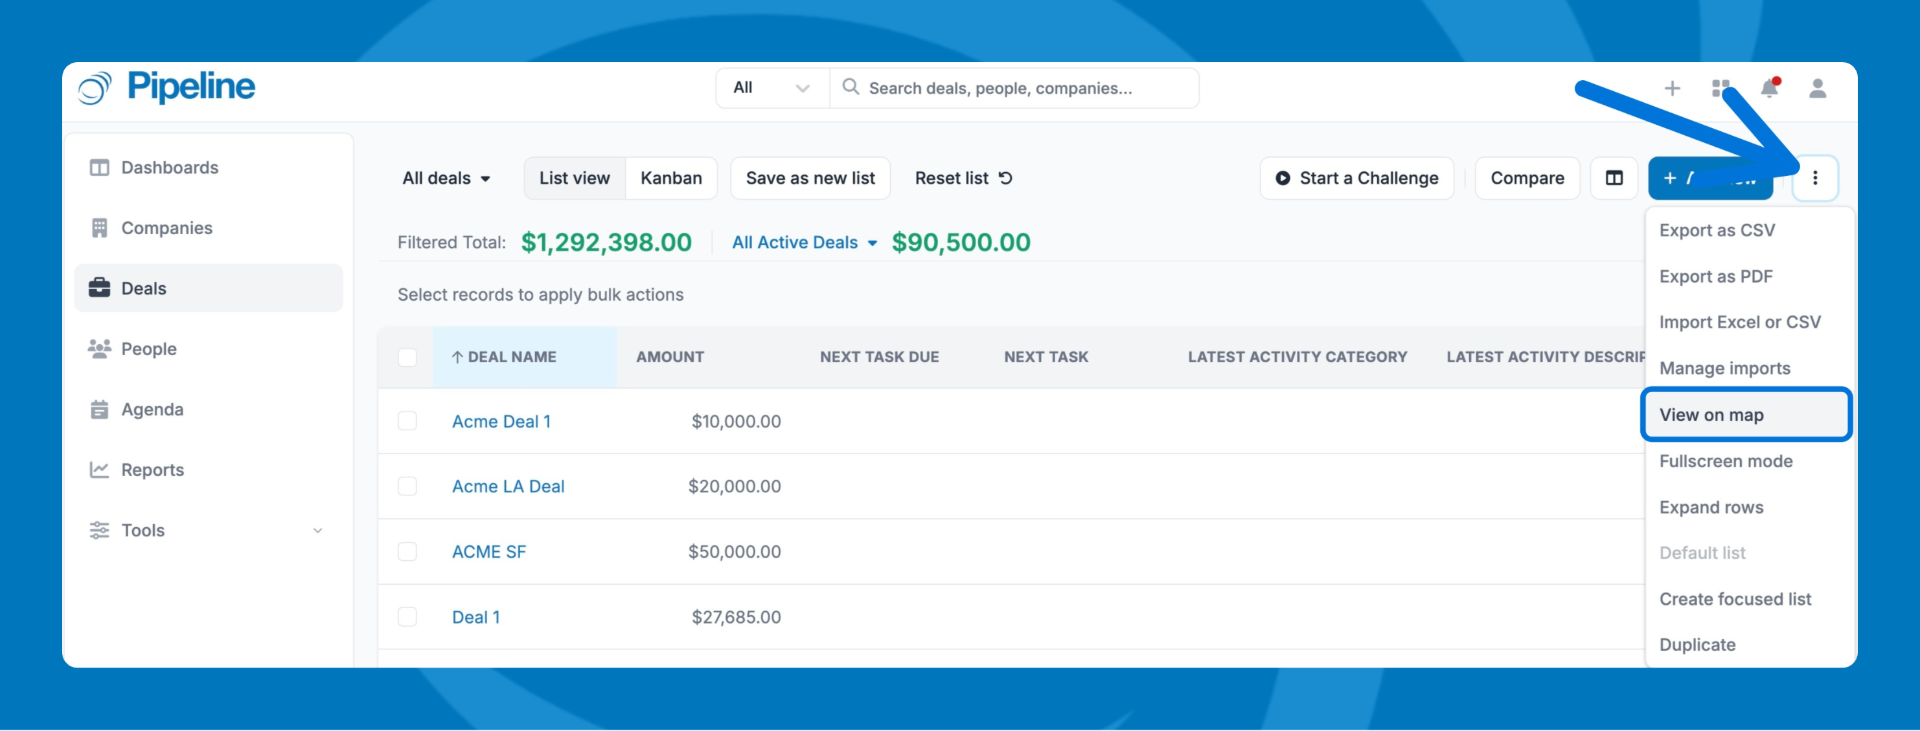
Using List Views
Navigate to a Company, People, or Deal list view and open List Options by clicking on the three dots in the upper right corner. Then, select "View on map" to display all records on your map.
Using Map Views
Visualize Contacts:
- Filter by record type:
Choose to view Companies, People, or Deals. - Recognize record types easily:
- 🏢 Building icon for Companies.
- 👤 Person icon for People.
- 💼 Briefcase icon for Deals.
- Explore clusters:
Groups of nearby contacts are shown as clusters—click to expand and see individual markers.
- Search bar:
Find addresses quickly. (Note: Searches are by address, not by company or person name.) - Filter icon:
Narrow results by specific fields to see only the contacts and companies you want. - Import List Views:
Bring in saved List Views to filter contacts on your map.
Creating a Route
- Zoom in and select at least three locations you wish to visit.
- Click “Start a New Route” to begin planning.
- Assign a title, add saved locations, set start and end points, and review selected locations.
- Save your route for future reference. View, edit, or delete as needed.
Here is more information on route planning using the mobile app.
Managing Saved Locations
- Add Frequent Destinations:
Save common addresses (like your office or home) for quicker route planning. - Toggle Saved Locations:
Enable or disable these during route confirmation to fit your needs.
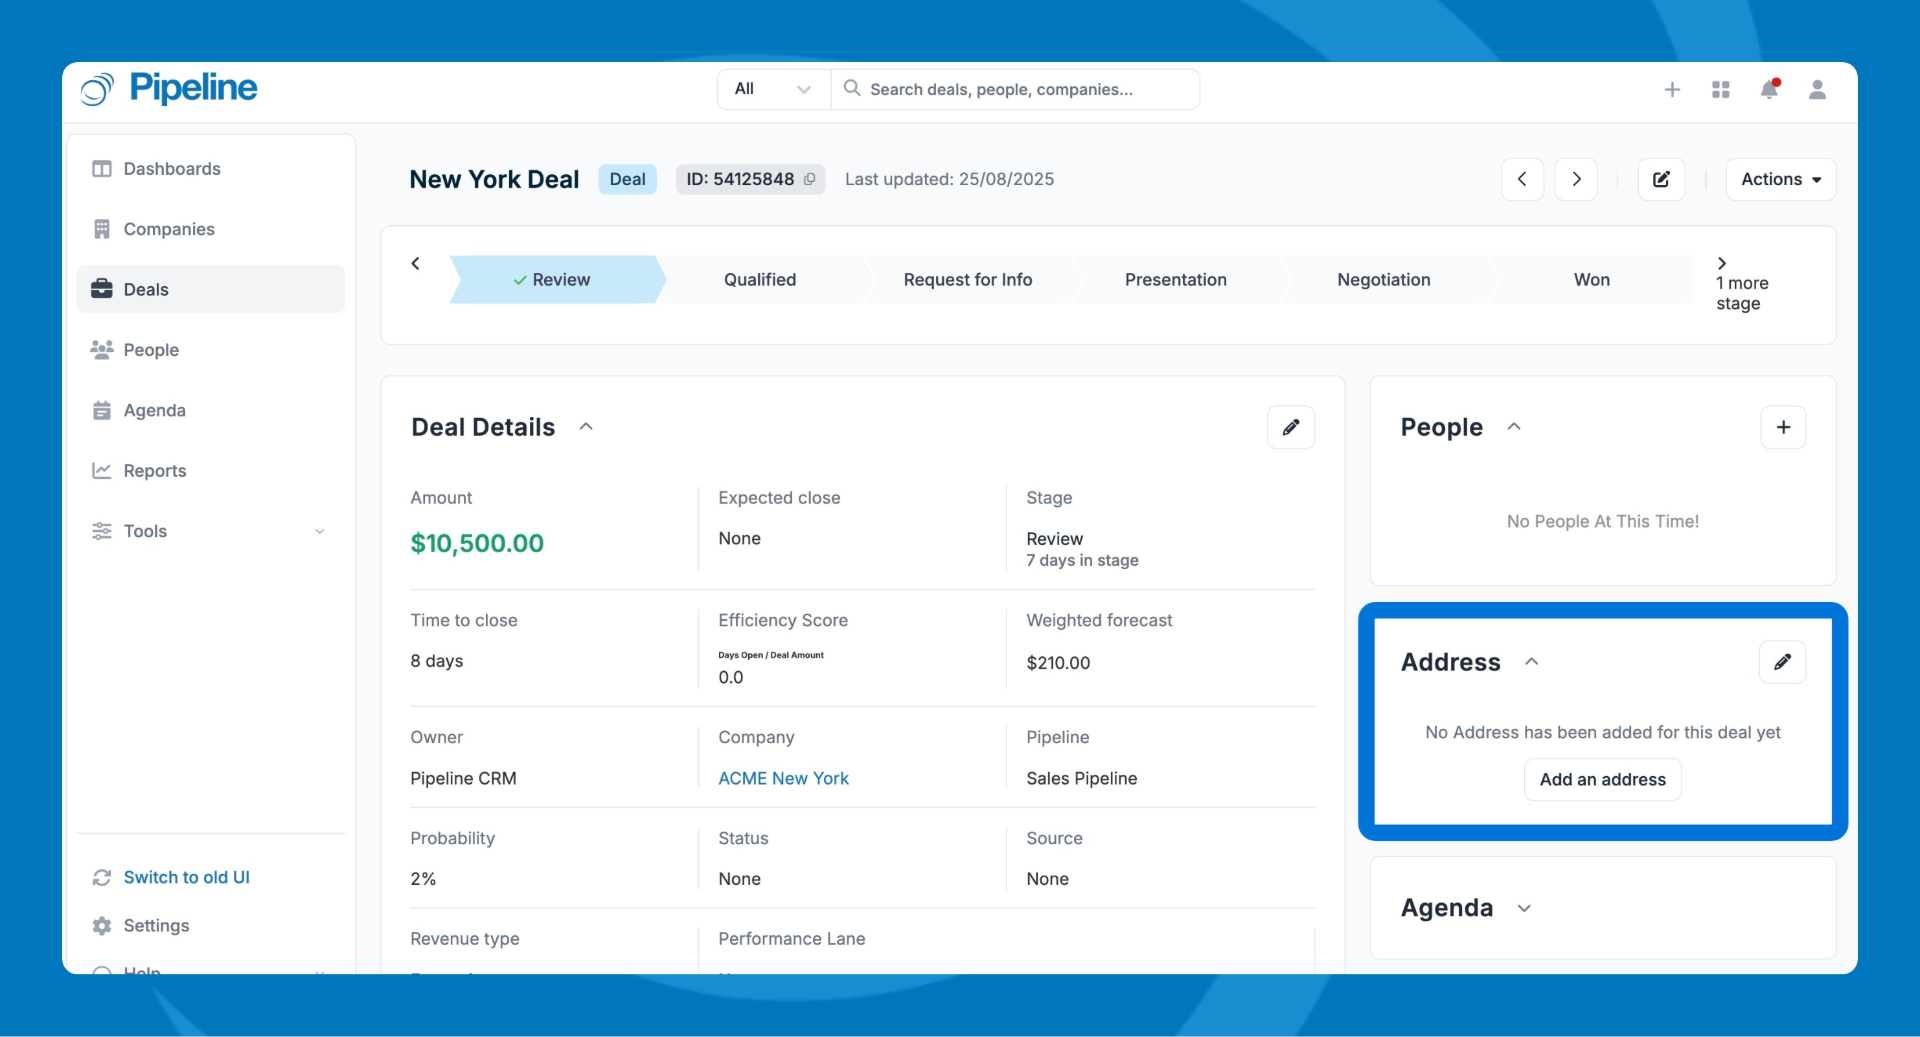
When you create or view a Deal, Pipeline CRM uses this logic to populate the address:
- If a Person is linked and has an address:
- The Deal uses the Person’s address.
- If no Person is linked, but a Company is linked and has an address:
- The Deal uses the Company’s address.
- If the Deal already has an address:
- Pipeline CRM will not override it.
FAQs
How many locations can I add to a route?
Up to 10 locations per route.
Why aren’t all locations visible when zoomed out?
The map shows up to 60 locations to keep things manageable. Zoom in or use filters for a closer look.
Is round-trip planning supported?
Not yet—only one-way routes for now.
Are these features available on all plans?
Yes, with monthly route credits per user:
- Start: 5 routes/month
- Develop: 15 routes/month
- Grow: 45 routes/month
- Credits reset on the first of each month and do not roll over.
No, you can explore map views as much as you like.
If you have any questions or run into any trouble, reach out to our support team at [email protected].