
Before you start:
- Admin permissions required
- An active Apollo.io account with a paid plan
Set Up the Integration
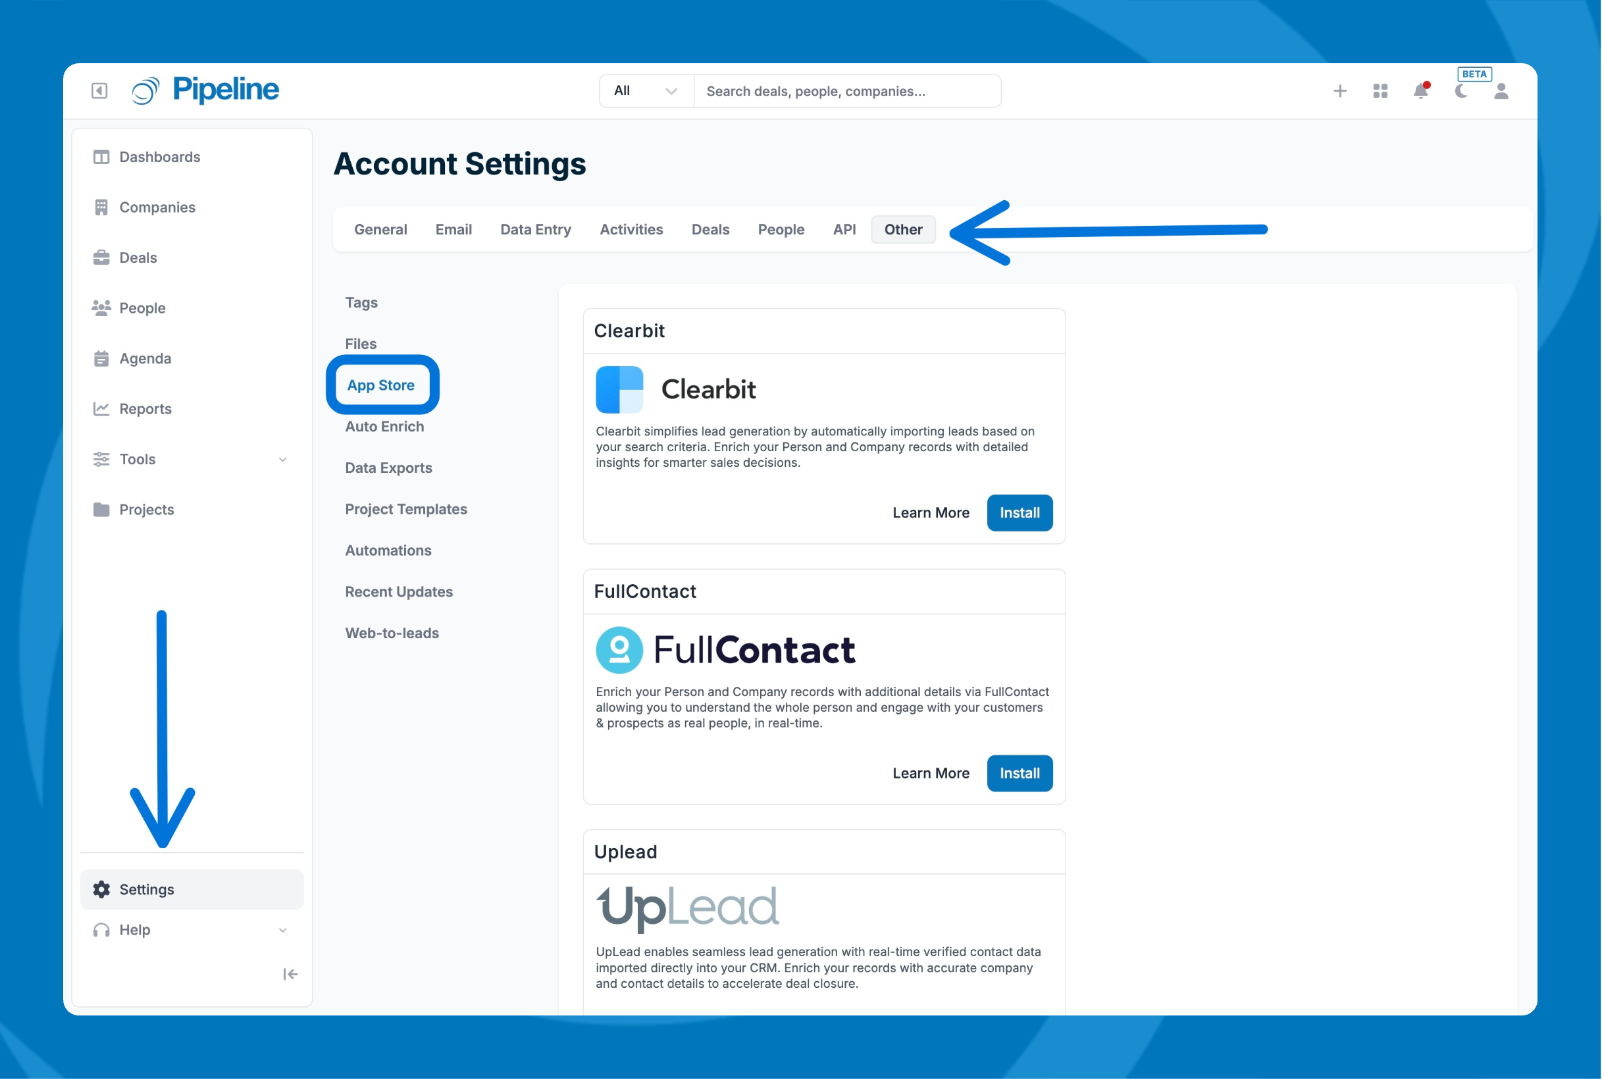
- Go to Settings > Other > App Store.
- Find Apollo.io, then click Install.
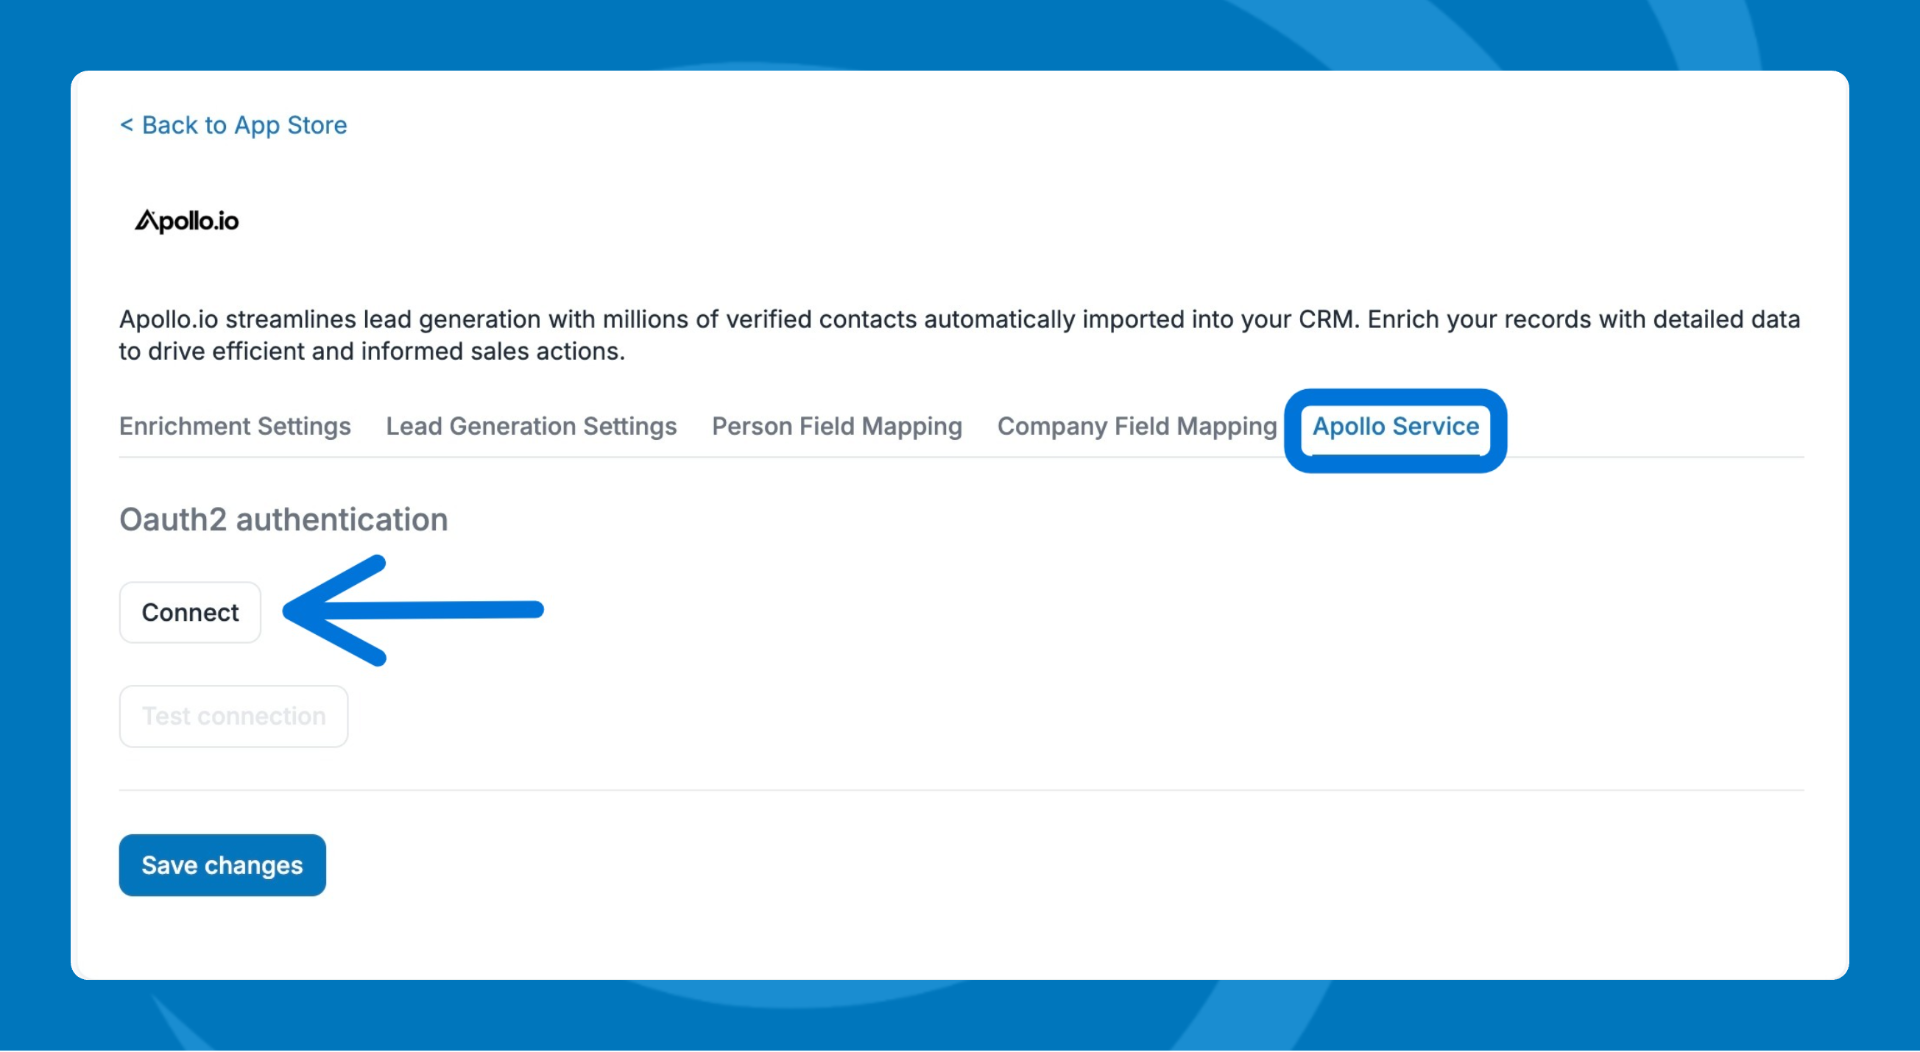
- Select the Apollo Service tab and click Connect.
- Follow the prompts to authorize the connection.
- Click Test Connection, then click Save changes. 

- Select the Enrich Settings tab.
- Choose which record types to enrich: Person fields, Company fields, or both.
- Decide whether to Override existing data when enriching records.
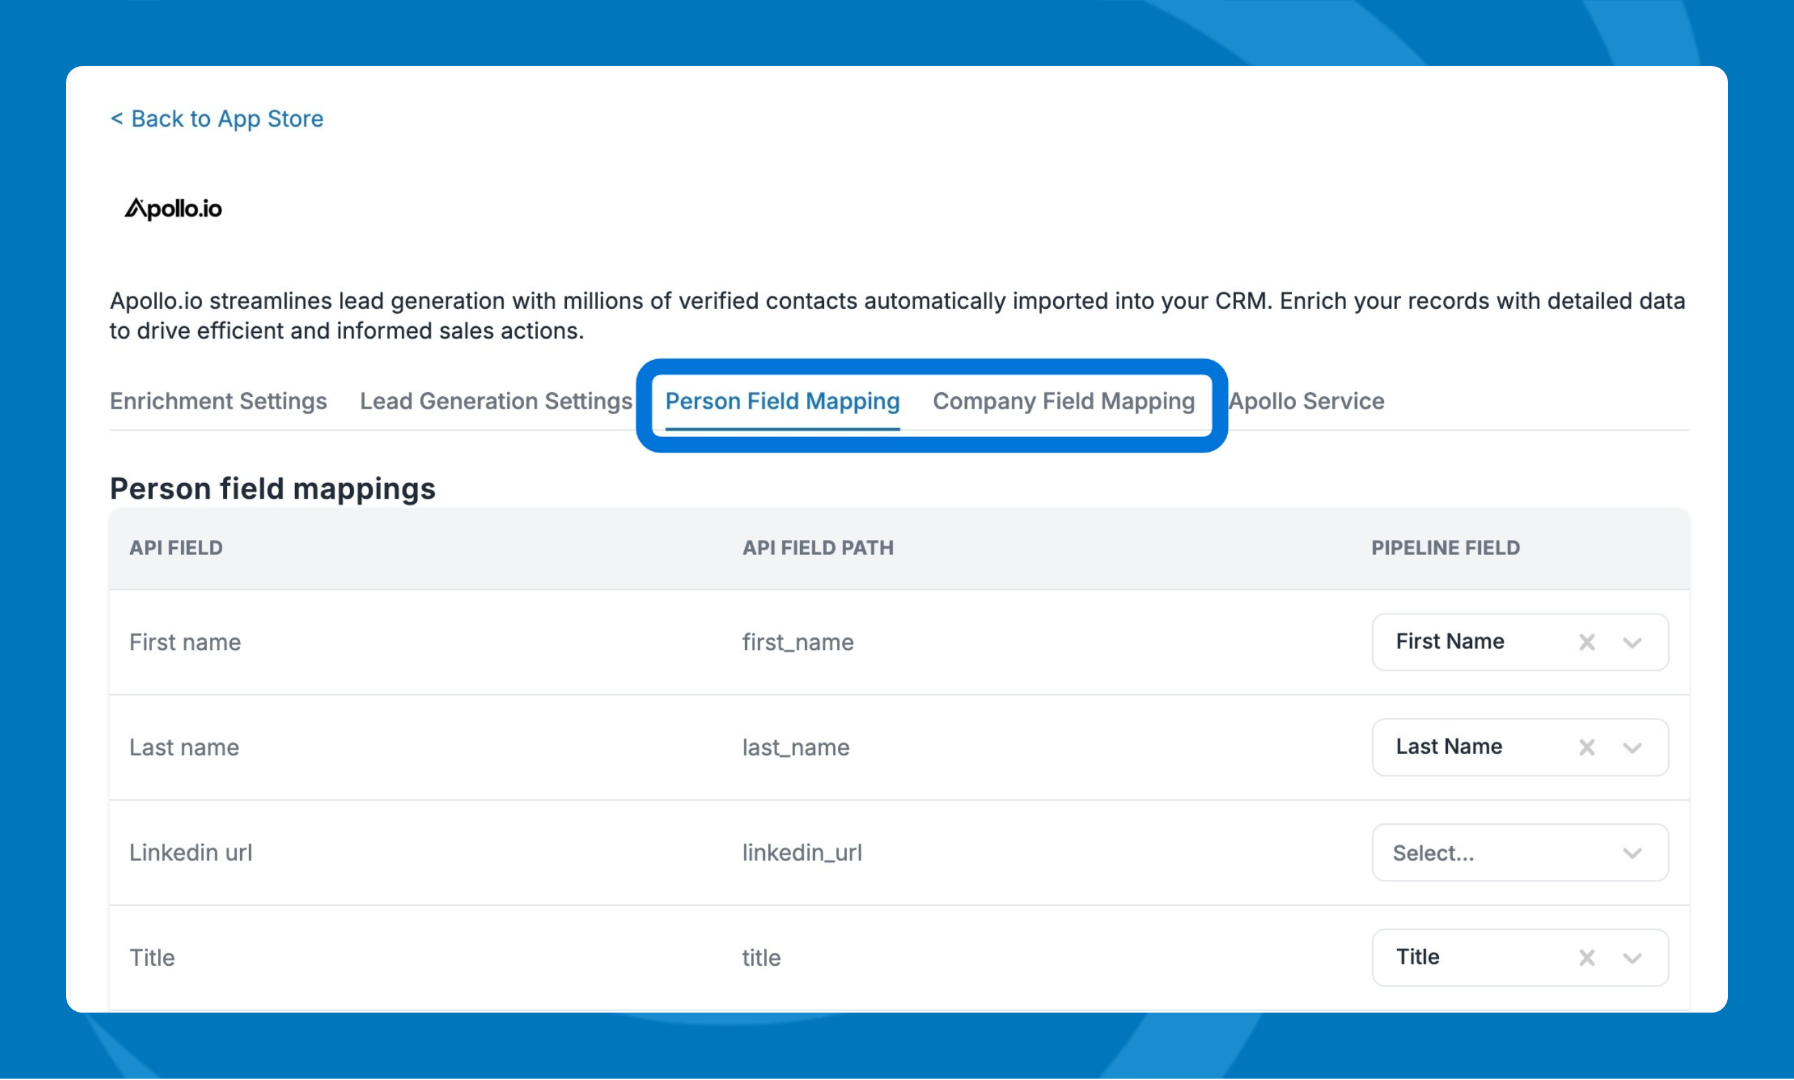
- Select the Person Field Mapping and/or Company Field Mapping tabs to review and adjust mappings.
- Click Back to App Store and enable the integration.


How Enrichment Works
- Records are enriched automatically based on work email:
- New person created with work email → Record is enriched
- Person updated, email unchanged → No enrichment
- Person updated, email changed → Record is enriched
⚠️ Note: Enabling the integration does not update all existing records. Only records created or updated after enabling will be enriched.
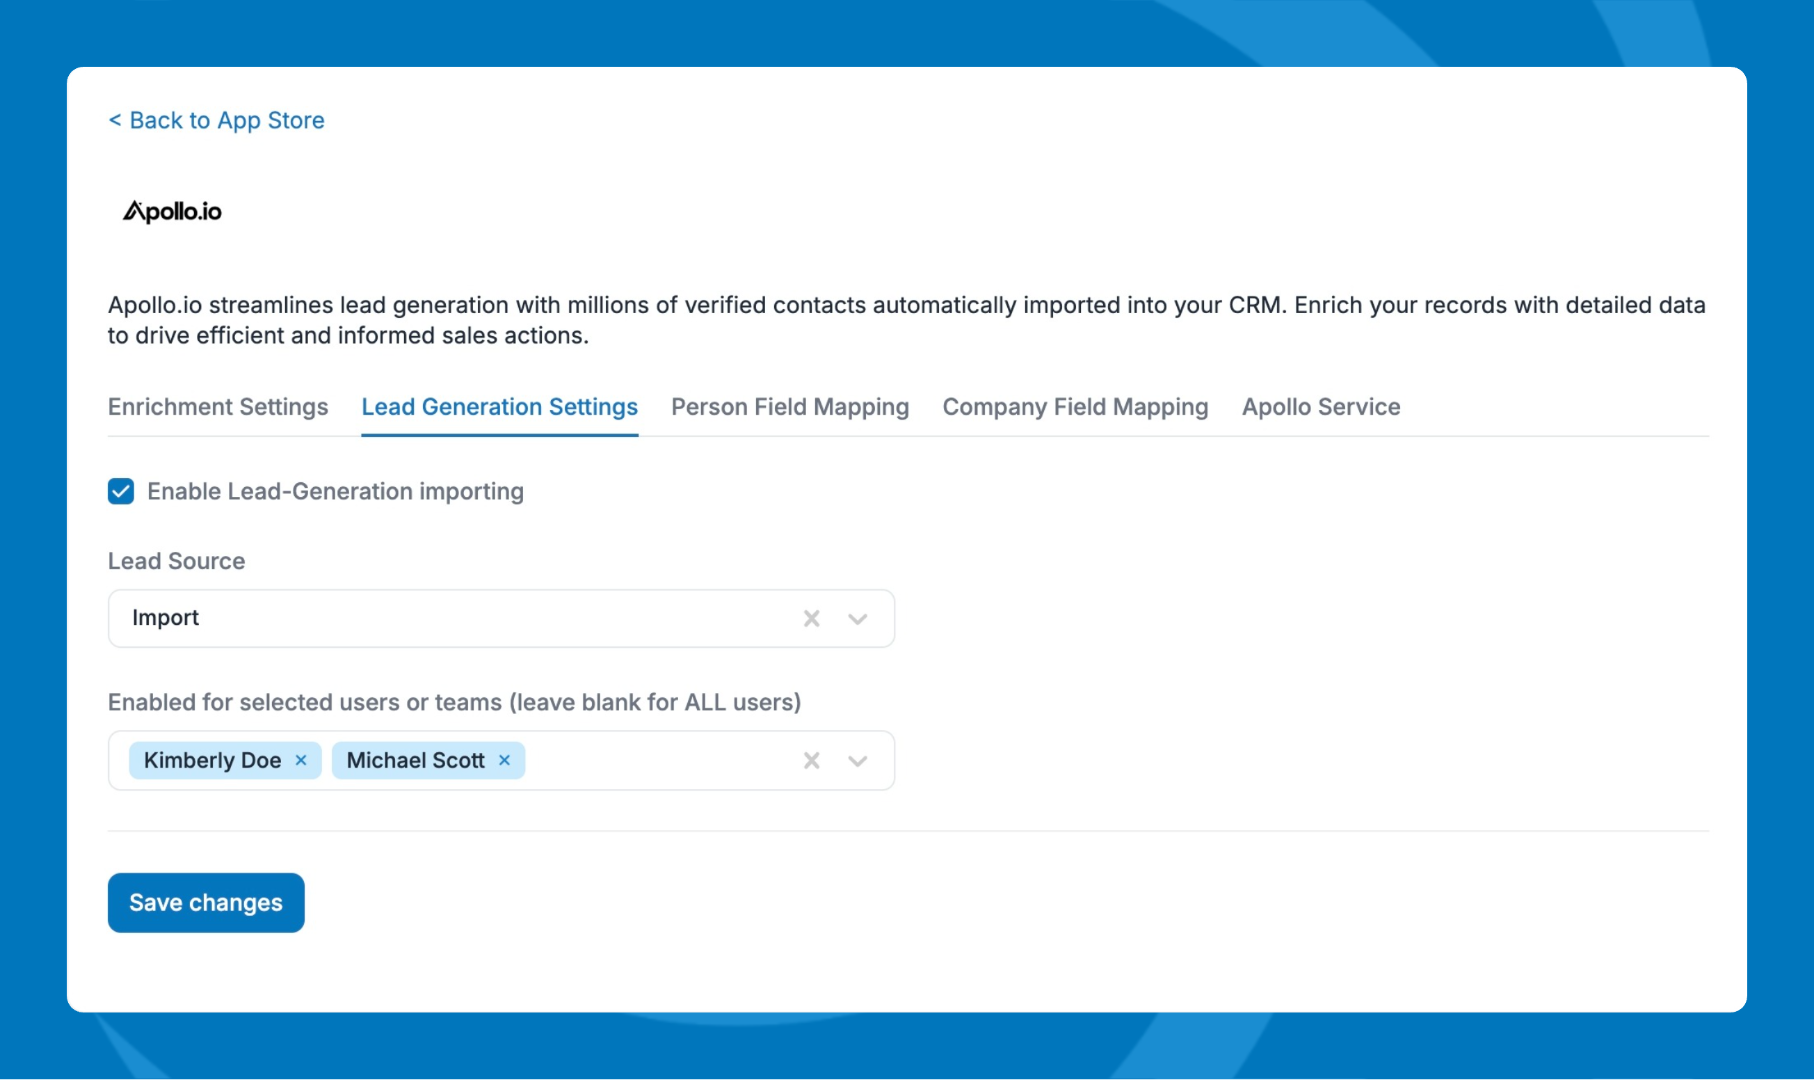
Enable Lead Generation (optional)- Go to Settings > Other > App Store > Select Apollo.io
- In the Lead Generation Settings tab.
- Enable Lead generation importing.
- Select a Lead Source (recommended).
- Select the users you wish to assign the leads to.
💡 Note: Lead generation uses the same field mapping you configured for enrichment.
Using Lead Generation: Find and import leads
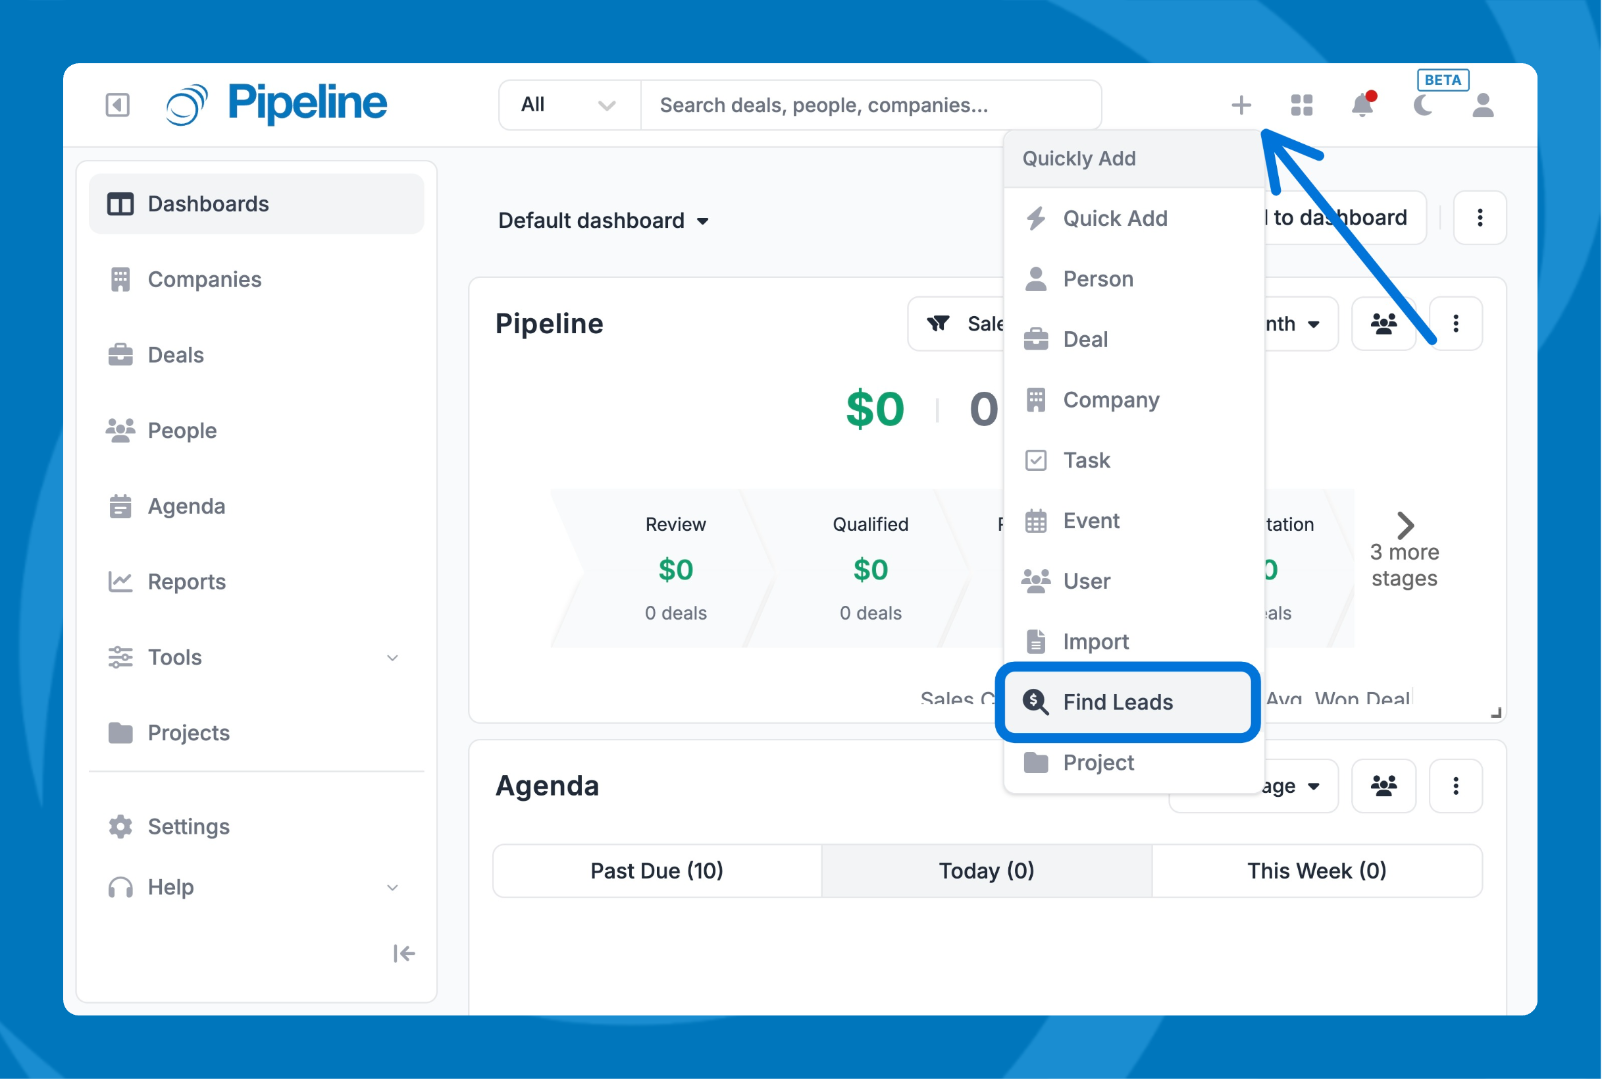
- Click the Add (+) icon, then select Find Leads.
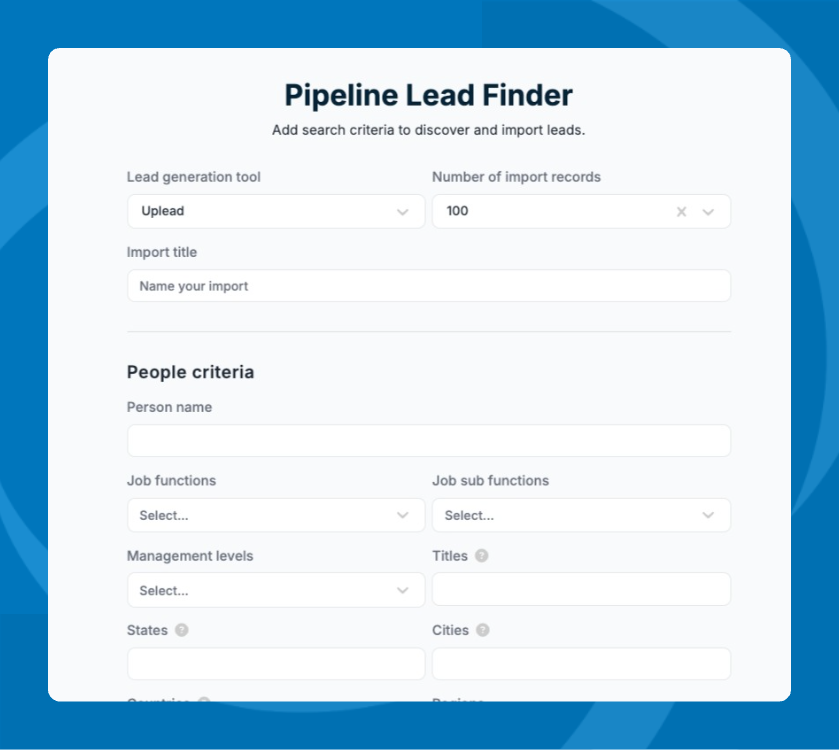
- Set your search criteria (Apollo.io filters), then choose how many leads to import.
- Click Import leads.
- Track progress on the status page, and use Manage Imports to review past imports. 
- Nothing is enriching: Confirm the person record has a work email and that the integration is enabled in the App Store.
- Data got replaced unexpectedly: Check whether Override Existing Data is enabled in your mapping settings.
- Fields aren't populating correctly: Review your field mapping, especially for any custom fields.