

Before you begin 
- You must have the Executive role to create Performance Pulse Goals.
- Ensure Performance Lanes are set up. If none exist, you’ll be prompted to create one first.
Set up Performance Pulse Lanes ↗
Before you begin, ensure that your role is an Executive to create performance pulse goals.
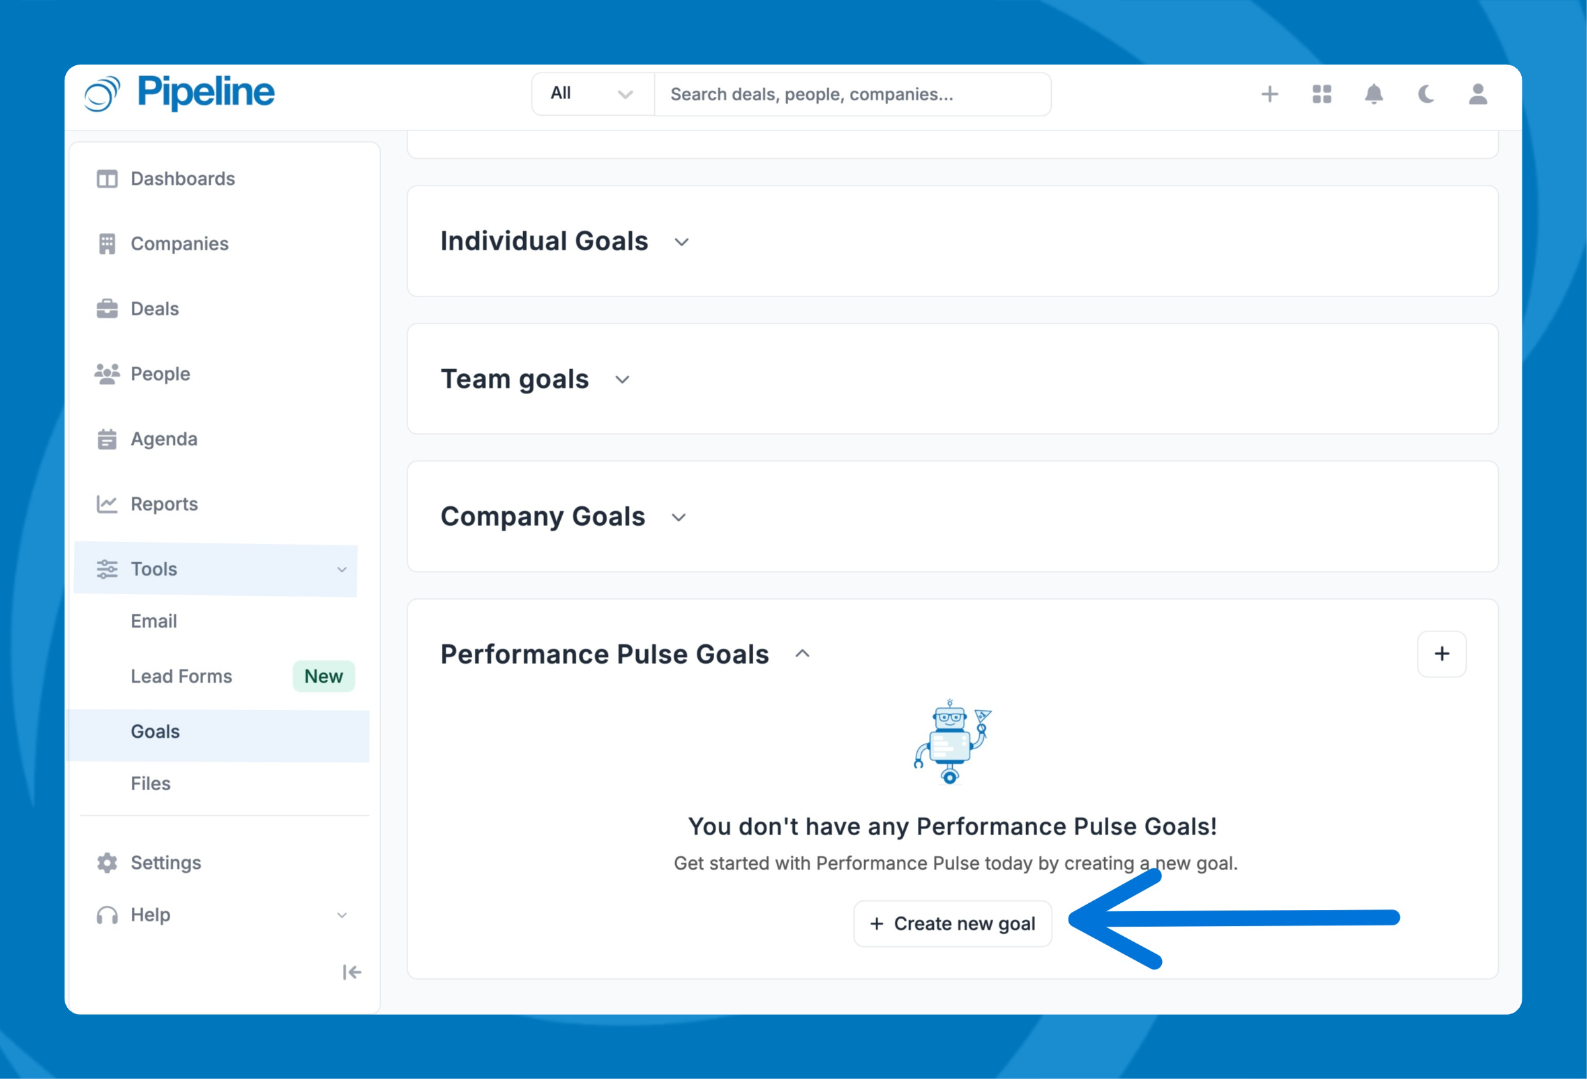
- In the side navigation, click Tools > Goals.
- Scroll down to the Performance Pulse Goals tile.
- Click on the + icon to create a new goal.
Note: If no Performance Lane exists yet, you’ll be prompted to create one before continuing.
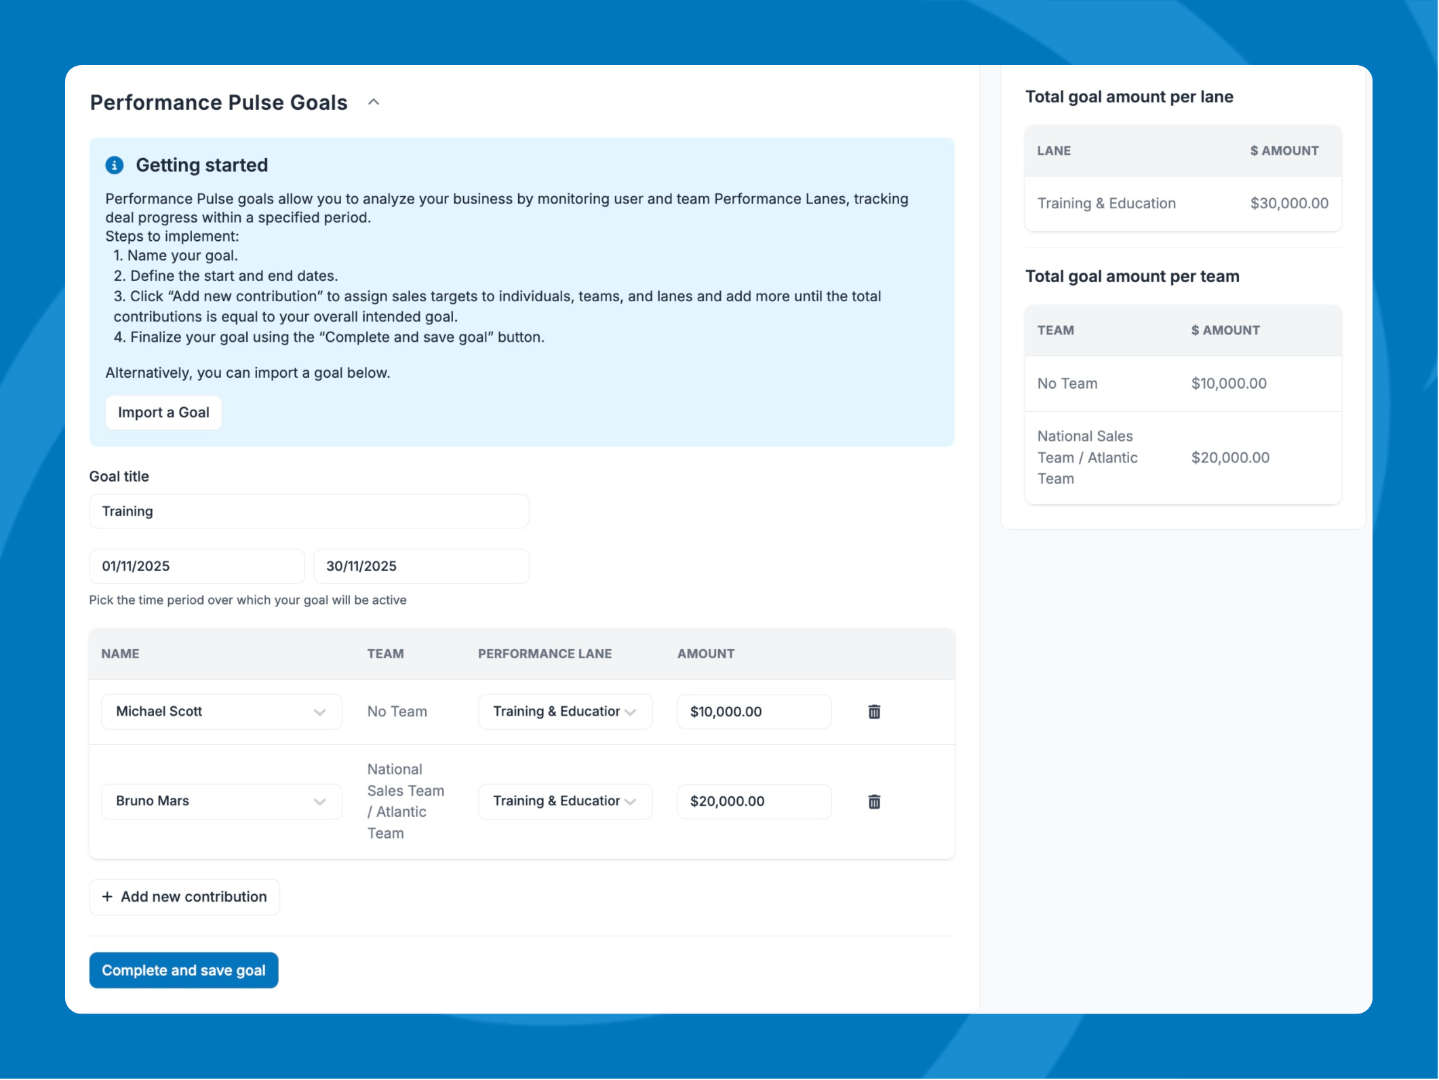
Create A Performance Pulse Goal 
- Enter a clear Goal name. This appears in the Goals tab and helps your team find progress quickly.
- Set the Start date and End date (annual, quarterly, monthly, or custom).
- Click + Add new contribution for each person and lane:
- Select an active user.
- Choose the Performance Lane.
- Enter the user’s numeric revenue target.
- Review the summary totals at the bottom by Lane and by Team to confirm alignment.
- Click Complete and save the goal.
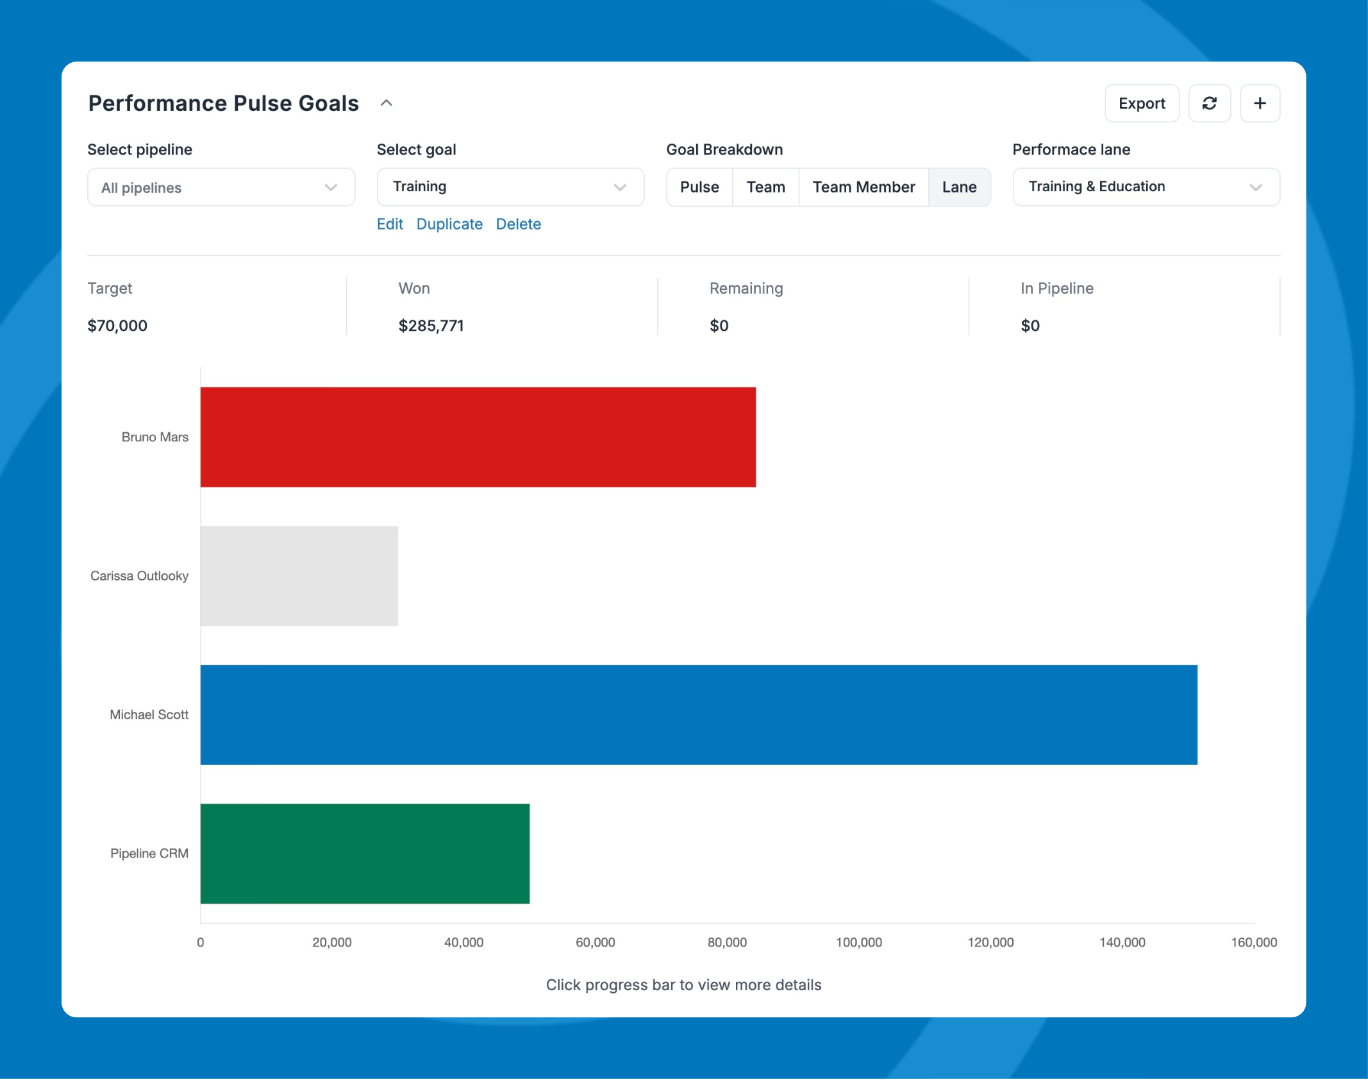
Viewing Performance Pulse Goals 
See progress toward your goals by lane, team, and individual. Views respect your Pipeline Account Team Management visibility settings, so each user sees the breakdowns they’re allowed to view.
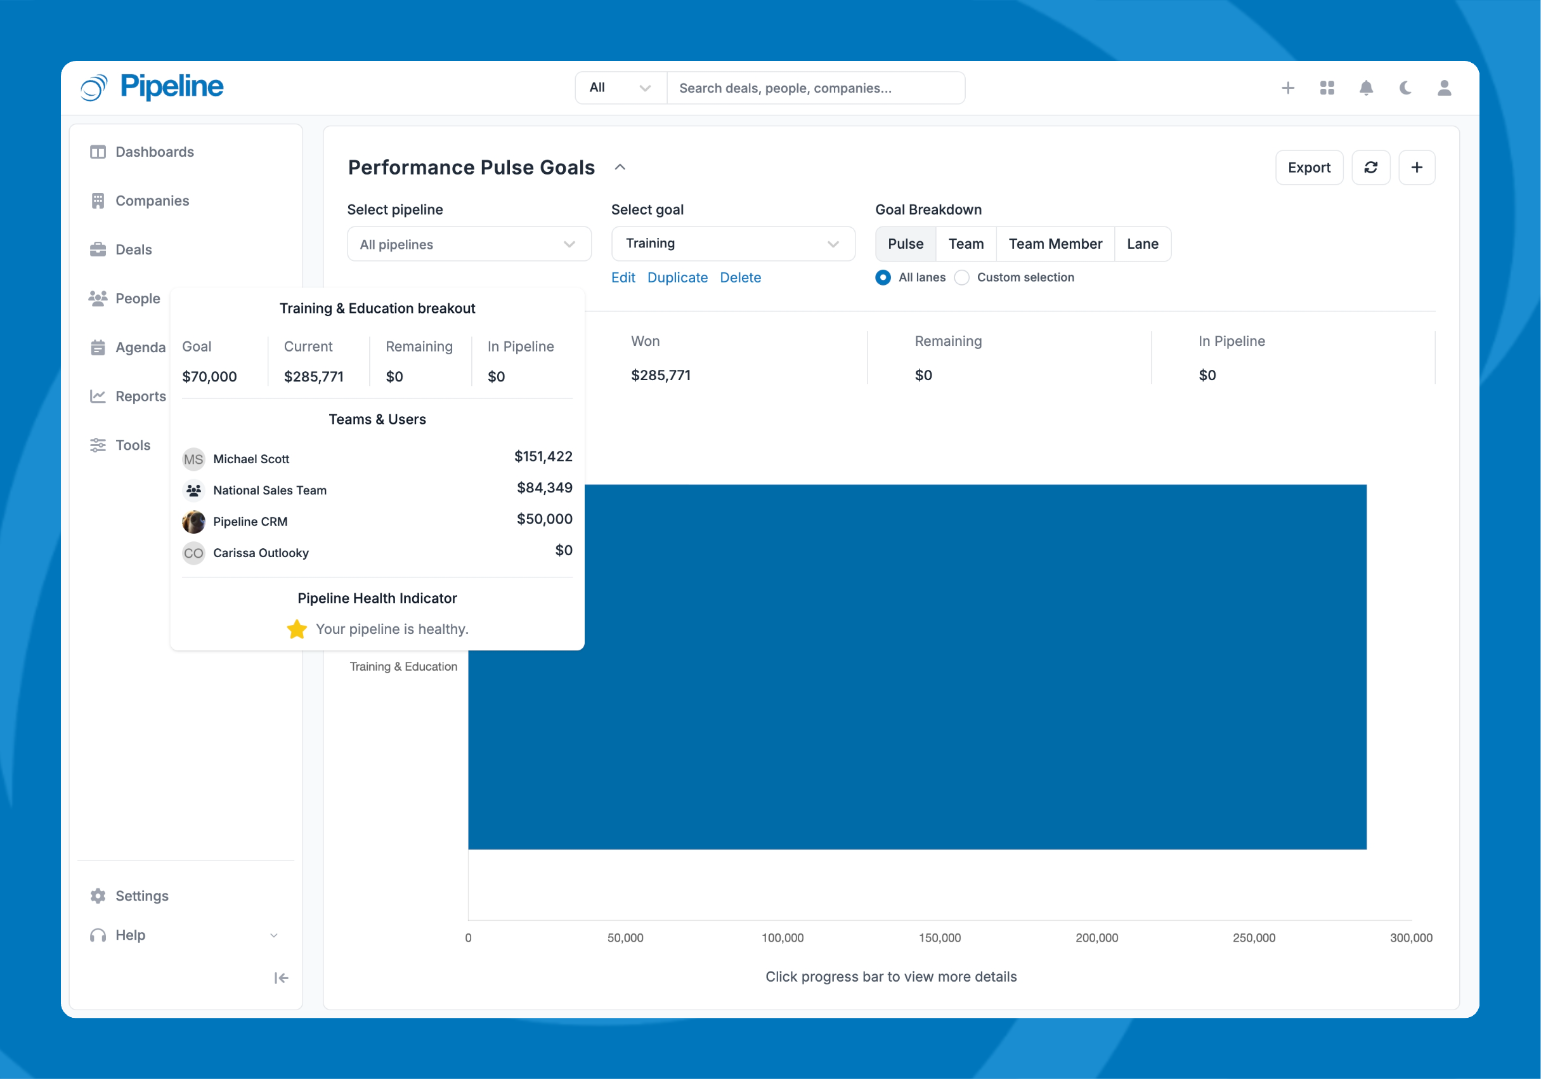
Filters you can use 
Pulse 
Shows total amount sold per Performance Lane—a top‑level overview of all revenue streams. Click the graph to see team‑level contributions, with executives broken out separately, and how much remains to meet the goal. If there’s a team hierarchy, only the top team is shown.
Team 
Focus on a single Team. Toggle between teams to see collective sales per lane. Click a total to break out who sold what and how much is left to reach the goal.
Team Member 
View progress for an individual Team Member or Executive. See each person’s contribution across all lanes where they have goals.
Lane 
Select a Performance Lane to see a user‑by‑user contribution breakdown. Use this to spotlight coaching opportunities or lane‑specific strengths.
Need help? Contact [email protected].