

Note: Customizing and sharing dashboards is only available on our Grow Plan.
1. Creating a New Dashboard
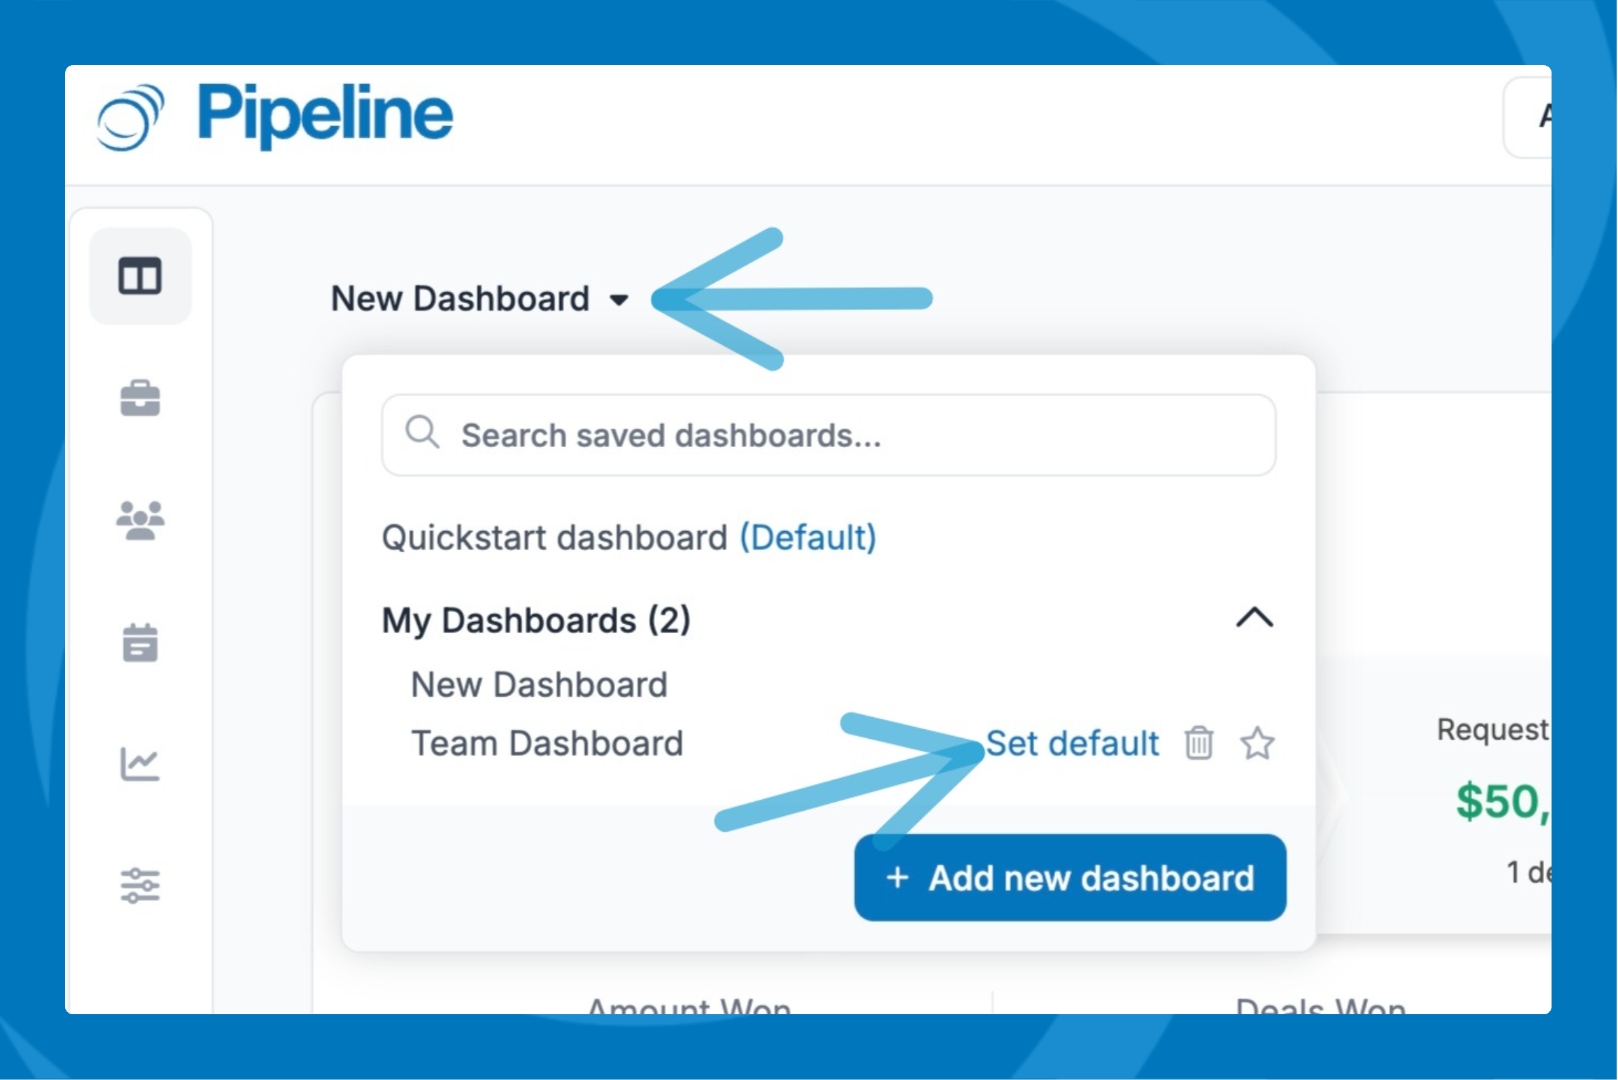
Open the Dashboards dropdown.
- Select Add New Dashboard.
- You can also edit the existing dashboard, this will prompt you to save as a new dashboard or save changes.
- Give your dashboard a clear, descriptive title.
- Choose your first content tile—options include list views, reports, or goals.
- Need help with tile types? Check out the Customizable Dashboards Overview here.
- Need help with tile types? Check out the Customizable Dashboards Overview here.
2. Adding and Managing Tiles
- To add tiles, click the "+ Add to dashboard" button located in the top right corner.
- Feel free to add as many as you need!
- You can select to add List Views, Goals, Agenda, Reports, Report Views, and default tiles.
- Default Tiles: Can only be added once to each dashboard. These are:
- Pipeline
- Agenda
- Latest Email Interactions
- Starred Lists
- Deals Slipping Away
3. Saving Your Dashboard
- Don’t forget to save!
Any edits won’t persist unless you click Save.- To keep multiple versions, use 'Save as new dashboard' and give it a unique name.
- Reset your dashboard at any time to undo unsaved changes.
- Find your dashboards: All of your saved dashboards are available in the dashboard dropdown menu.
- Highlight favorites: Click the star next to a dashboard name to mark it as a key dashboard.
- Set Default: Set a dashboard as default so that it opens up when you access your Pipeline account.
4. Customizing Your Dashboard
Make your dashboard your own by:- Resizing Tiles:
Drag the bottom-right corner of a tile to resize it. - Repositioning Tiles:
Click and hold the top-left corner to reposition the tiles. - Filtering Tiles:
Some tiles support filtering by user—just use the user dropdown menu (available for agenda, deals slipping away, and pipeline tiles) to choose which user’s data to view.
5. Using Tile Actions
Each tile offers quick actions (click the three dots in the upper-right):- Remove: Delete the tile from your dashboard.
- Go to: Open the original list, goal, or report linked to the tile.
- Move to another dashboard: Shift a tile to a different dashboard. It will no longer appear on the original.
- Copy to another dashboard: Duplicate a tile onto another dashboard (so it appears in both places).
- Refresh: Instantly update the tile with the latest data.