

How esign Works
The eSignature feature lets you:
- Send documents for signature from Person, Deal, and Company profiles using Instant Docs.
- Keep everything in one place—no third-party eSign tools required.
- Follow a simple two-step request flow (set recipients → place signature fields).
- Get real-time status updates and automatic activity logging for each request.
Make sure:
- You’re on the Grow plan (eSign is only available for Grow accounts).
- You’re using Instant Docs to generate your documents.
- An admin has configured eSign settings in the admin area.
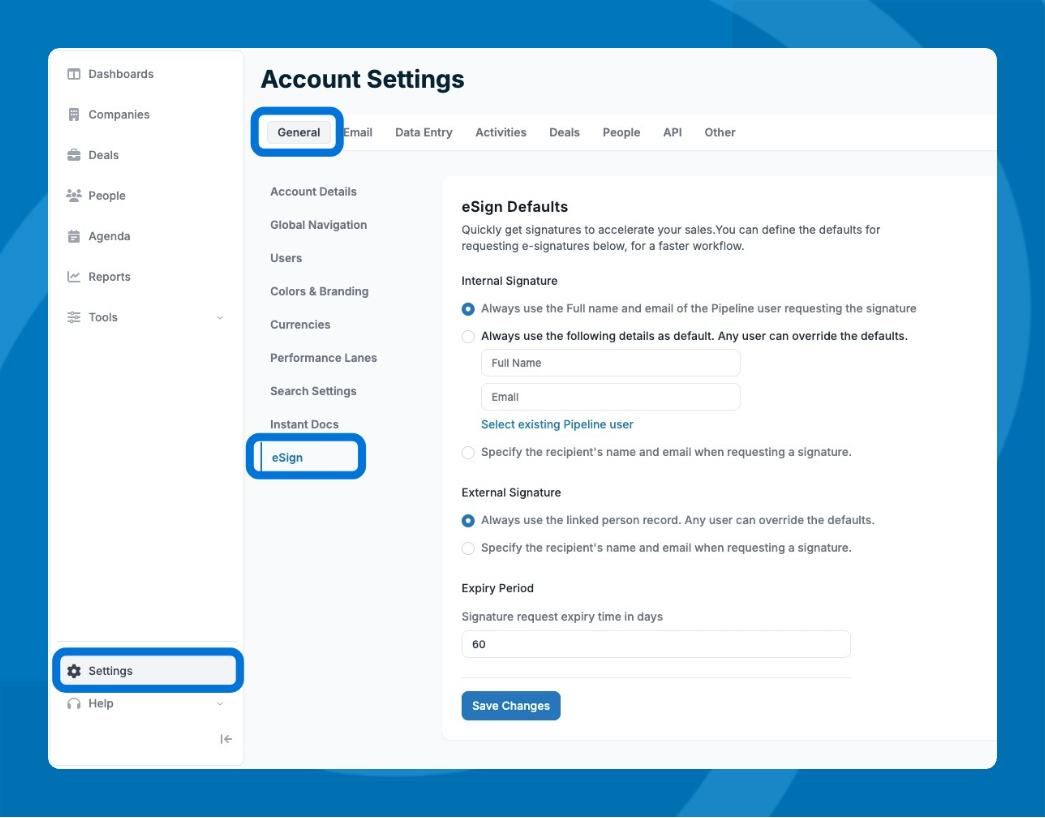
To configure eSign go to Settings > General > eSign.
- Internal Signature
Choose the default internal signer (for example, a sales manager, CEO, or other authorized signer) who signs on behalf of your company. - External Signature
Define how external signatures are handled by default (for example, which contact should be used, or if the linked person should always be the signee). - Expiry period
Set how long an eSign request stays valid before it expires.
Sending an eSign Request
Step 1: Create the document
- Go to a company, person, or deal record. (This depends on the type of record your admin has enabled the Instant Doc template for.)
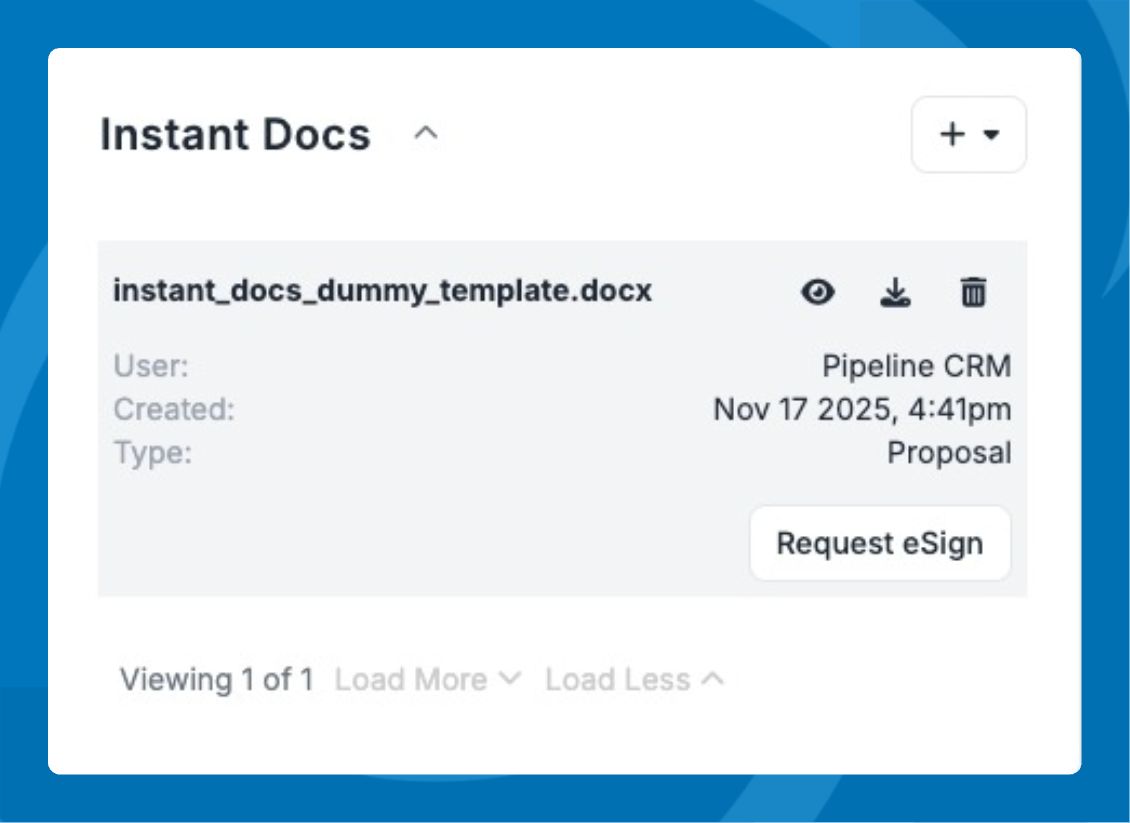
- Locate the Instant Docs tile and generate your document (for example, a proposal or contract).
Click here for more information on how to set up an Instant Docs template. - Once the document is generated, click on the Request eSign button.
Step 2: Set up signers
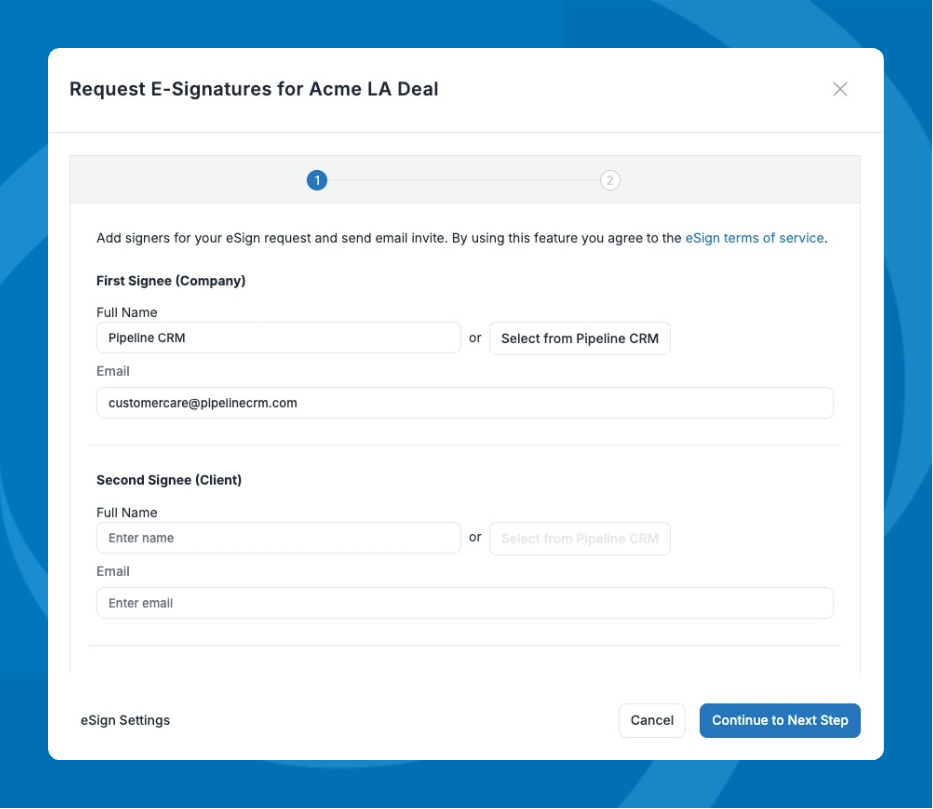
- The Request eSign flow will open with a two-step process.
- Pipeline CRM will pre-fill:
- First signatory (typically your internal signer).
- Second signatory (typically your customer/contact).
- Choose who should sign first (an internal or an external party).
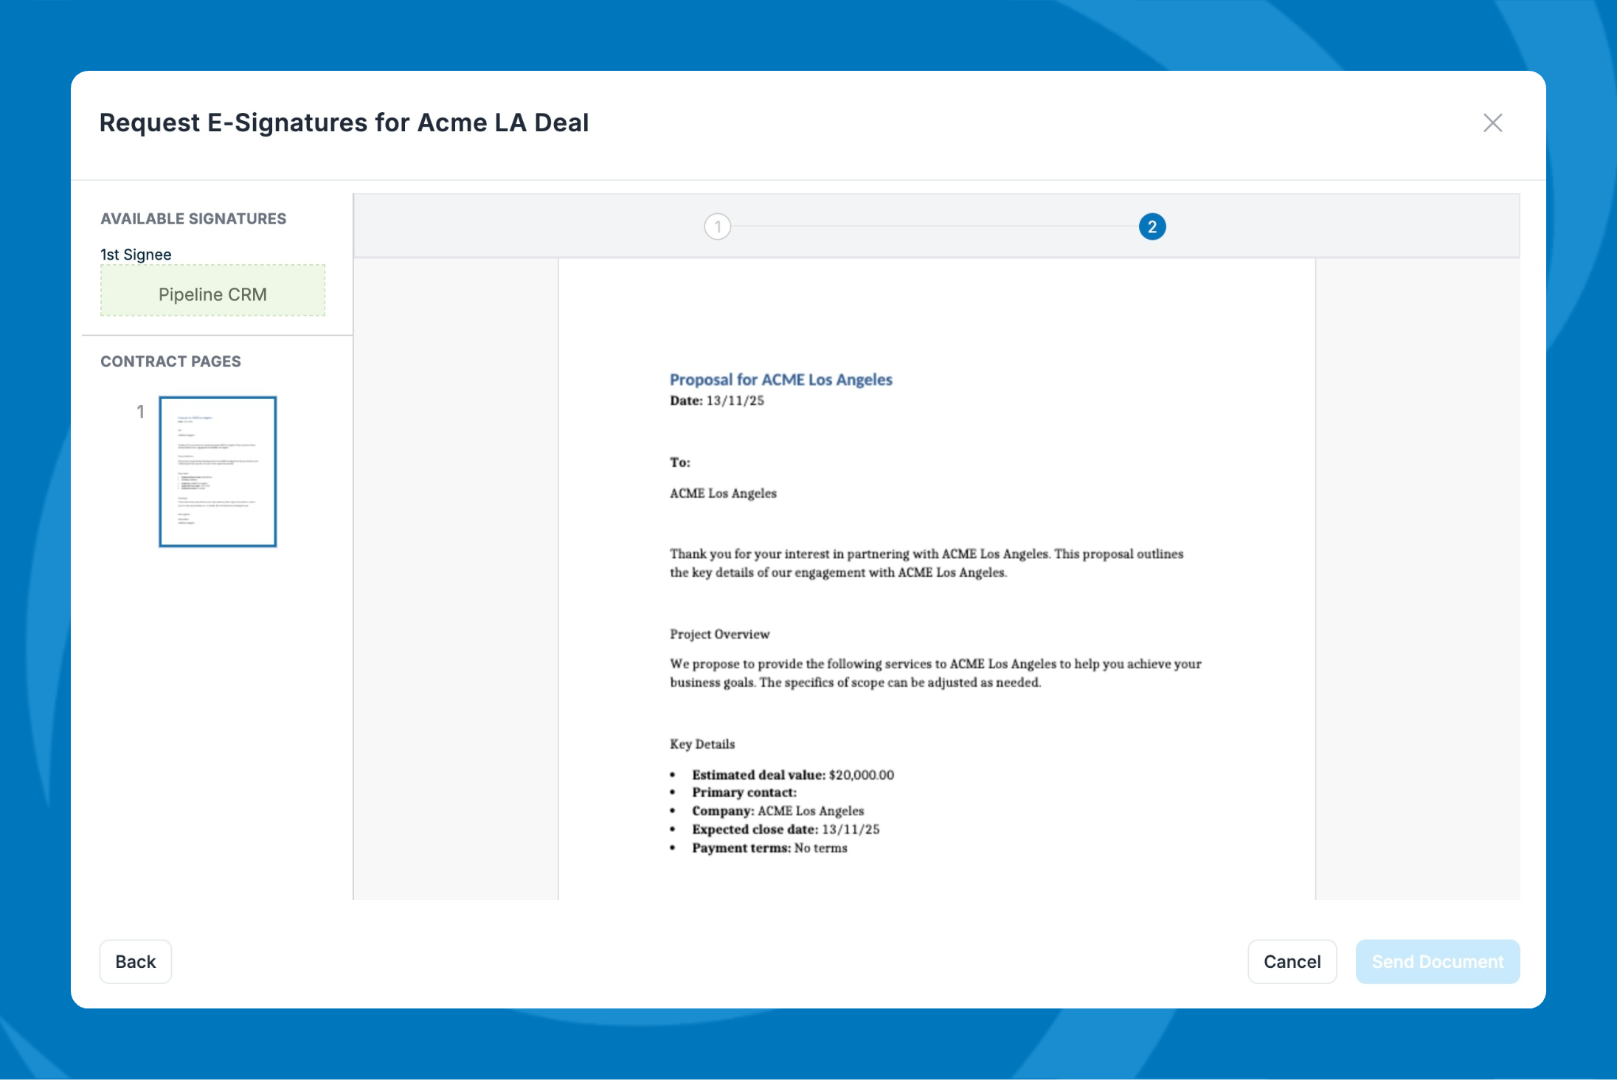
Step 3: Place signature fields
- Use the drag-and-drop interface to place:
- Signature blocks
- Initials or other required fields (where applicable)
- Assign each field to the correct signatory.
Step 4: Send the document
- Review the layout and signers.
- Click Send to start the eSignature process.
- The first signatory receives an email with a secure link to the document.
- The status in Pipeline CRM updates so you can track progress.
Here’s what your signers experience:
- Email notification
- The signer receives an email with a button or link to open the document.
- Open the signing page
- The document is displayed.
- A thumbnail view appears on the left.
- Signature fields and prompts are shown on the right or directly on the page.
- Adopt and apply signature
- Click on the signature area.
- Click your full name to adopt your signature.
- Click Agree and Finish to complete signing.
- Next signer is notified
- Once the first signer finishes, the request automatically moves to the next signatory.
- When all signers are done, both parties receive a signed copy by email.
Mobile signing is supported. Turning the phone to landscape can make it easier on smaller screens.Track status and activities in Pipeline CRM
Automatic activity logging
Pipeline CRM automatically creates activities when:
- An eSign request is created.
- A document is successfully signed.
- A request is canceled.
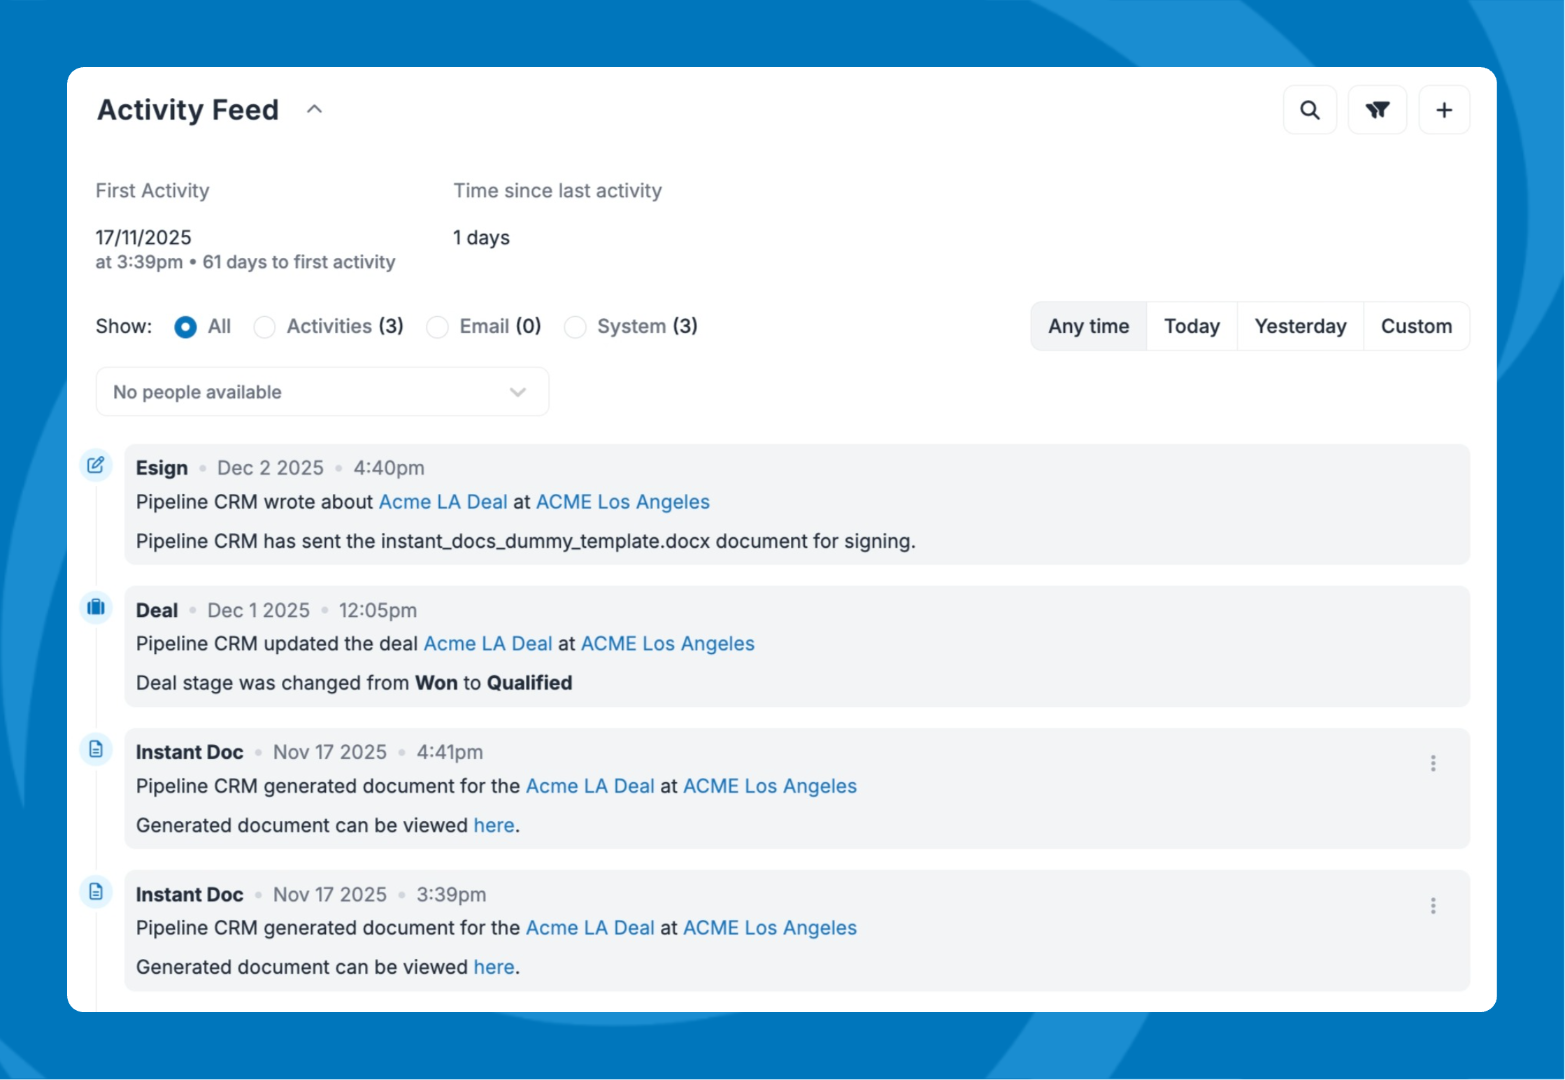
Status tracking
From the profile, you can see:
- Email sent
- Document viewed
- Signature received from each party
- Completed or Canceled status
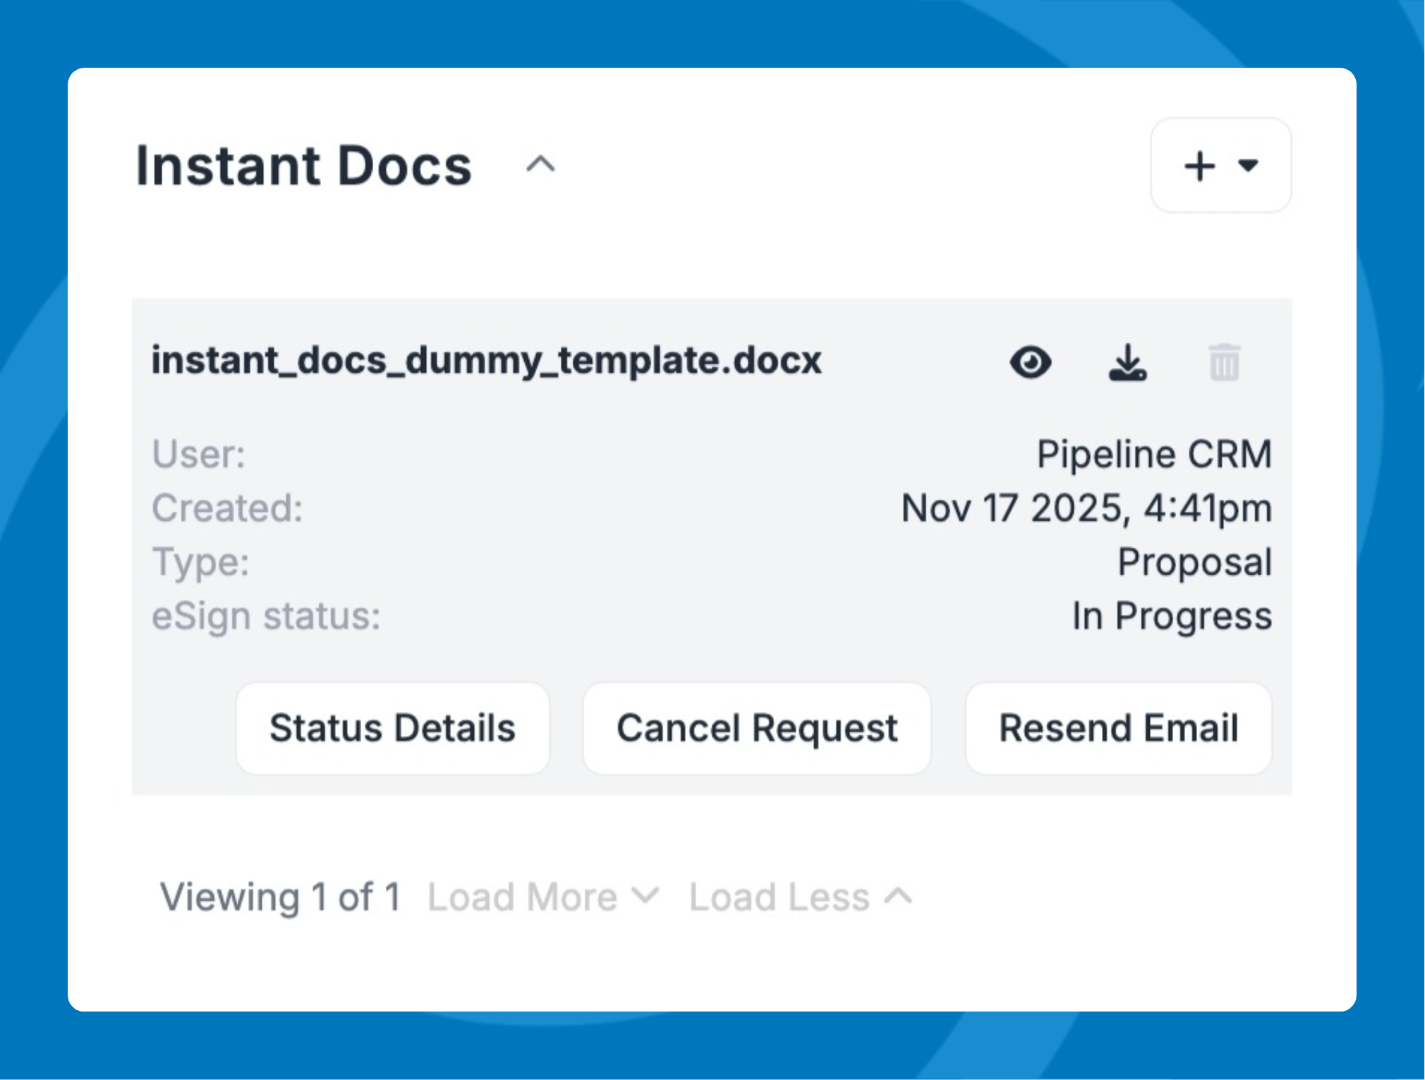
Manage Requests
Cancel an eSign request
You can cancel the request any time before all signers have completed their signatures.
- When you cancel:
- The request is stopped.
- A cancellation email is sent to all relevant parties.
- An activity is logged in the record.
Resend a signature request
If a signer is slow to respond:
- Use the resend email (often shown as a “bump” or “resend” CTA).
- This sends another reminder email to the signer who is currently due to sign.
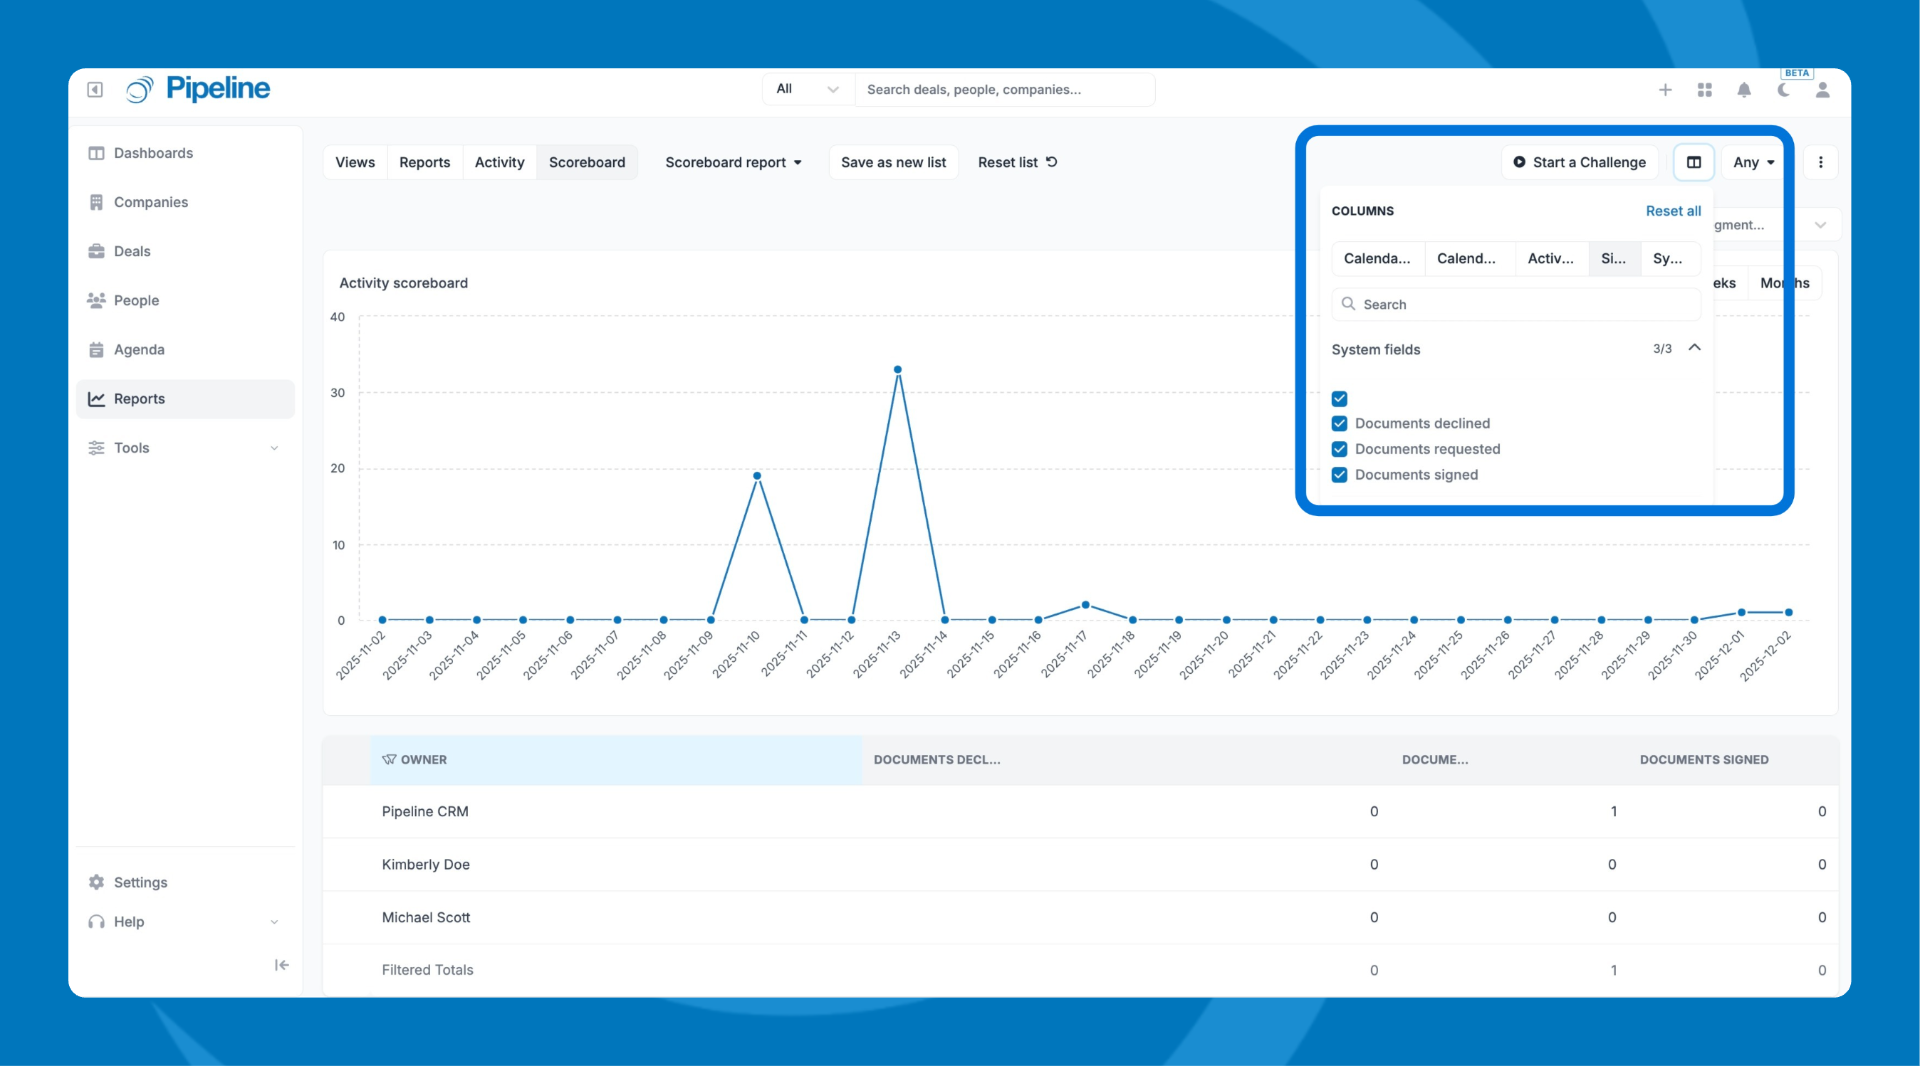
Reporting
Leaders can monitor eSign usage and performance through activity reporting:
- Activity scoreboard
- Track how many documents were:
- Requested
- Signed
- Declined or canceled
- View performance for individual reps across selected time periods.
Need help? Reach out to our support team at [email protected].