

Before you start ensure that your email is synced! Click here for more information on how to sync your email.
Customize Your Signature
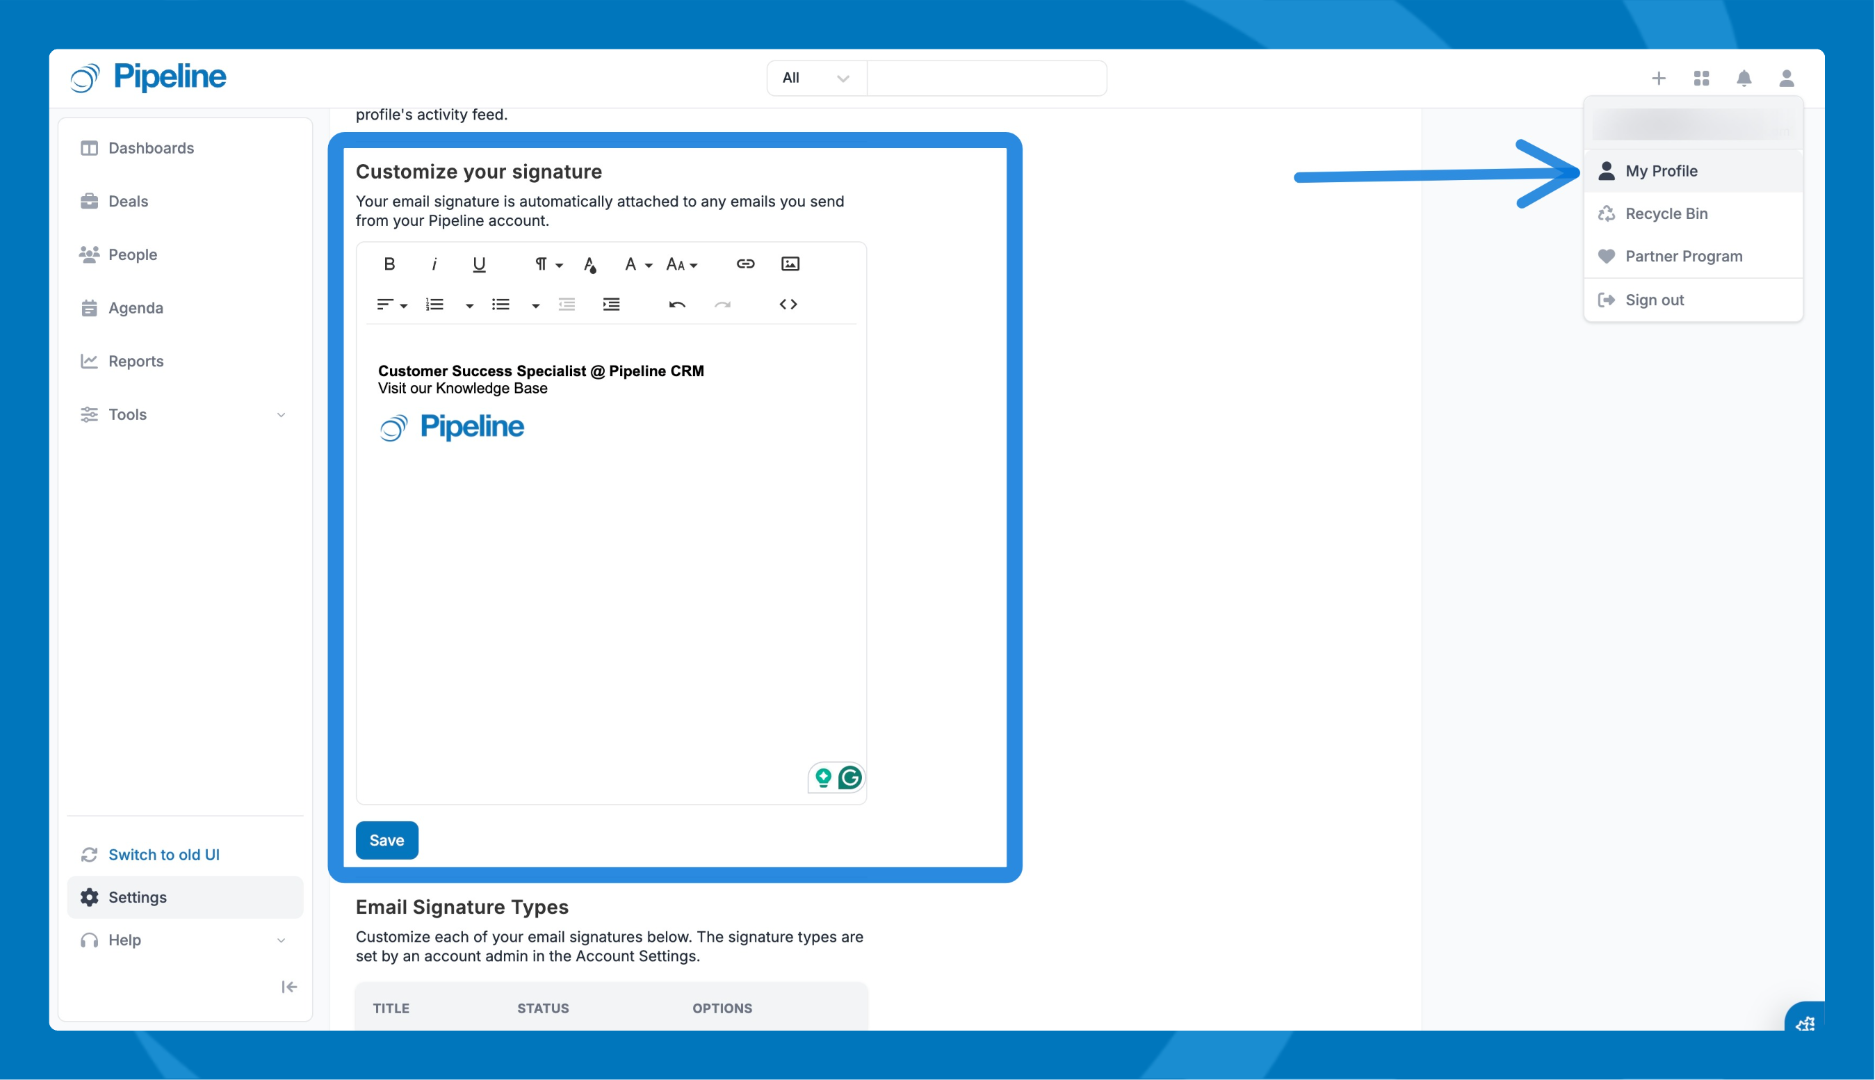
- Click your profile icon the top right corner and select My Profile.
- Click the Email tab.
- Scroll down to the Customize your signature section.
- Use the formatting toolbar to build your signature. You can bold, italicize, or underline text, adjust font styles and sizes, add hyperlinks, and insert images like a company logo or headshot.
- Click Save changes when you're done.
After saving, your signature will automatically appear at the bottom of all emails sent through Pipeline CRM using the Email Sync feature.
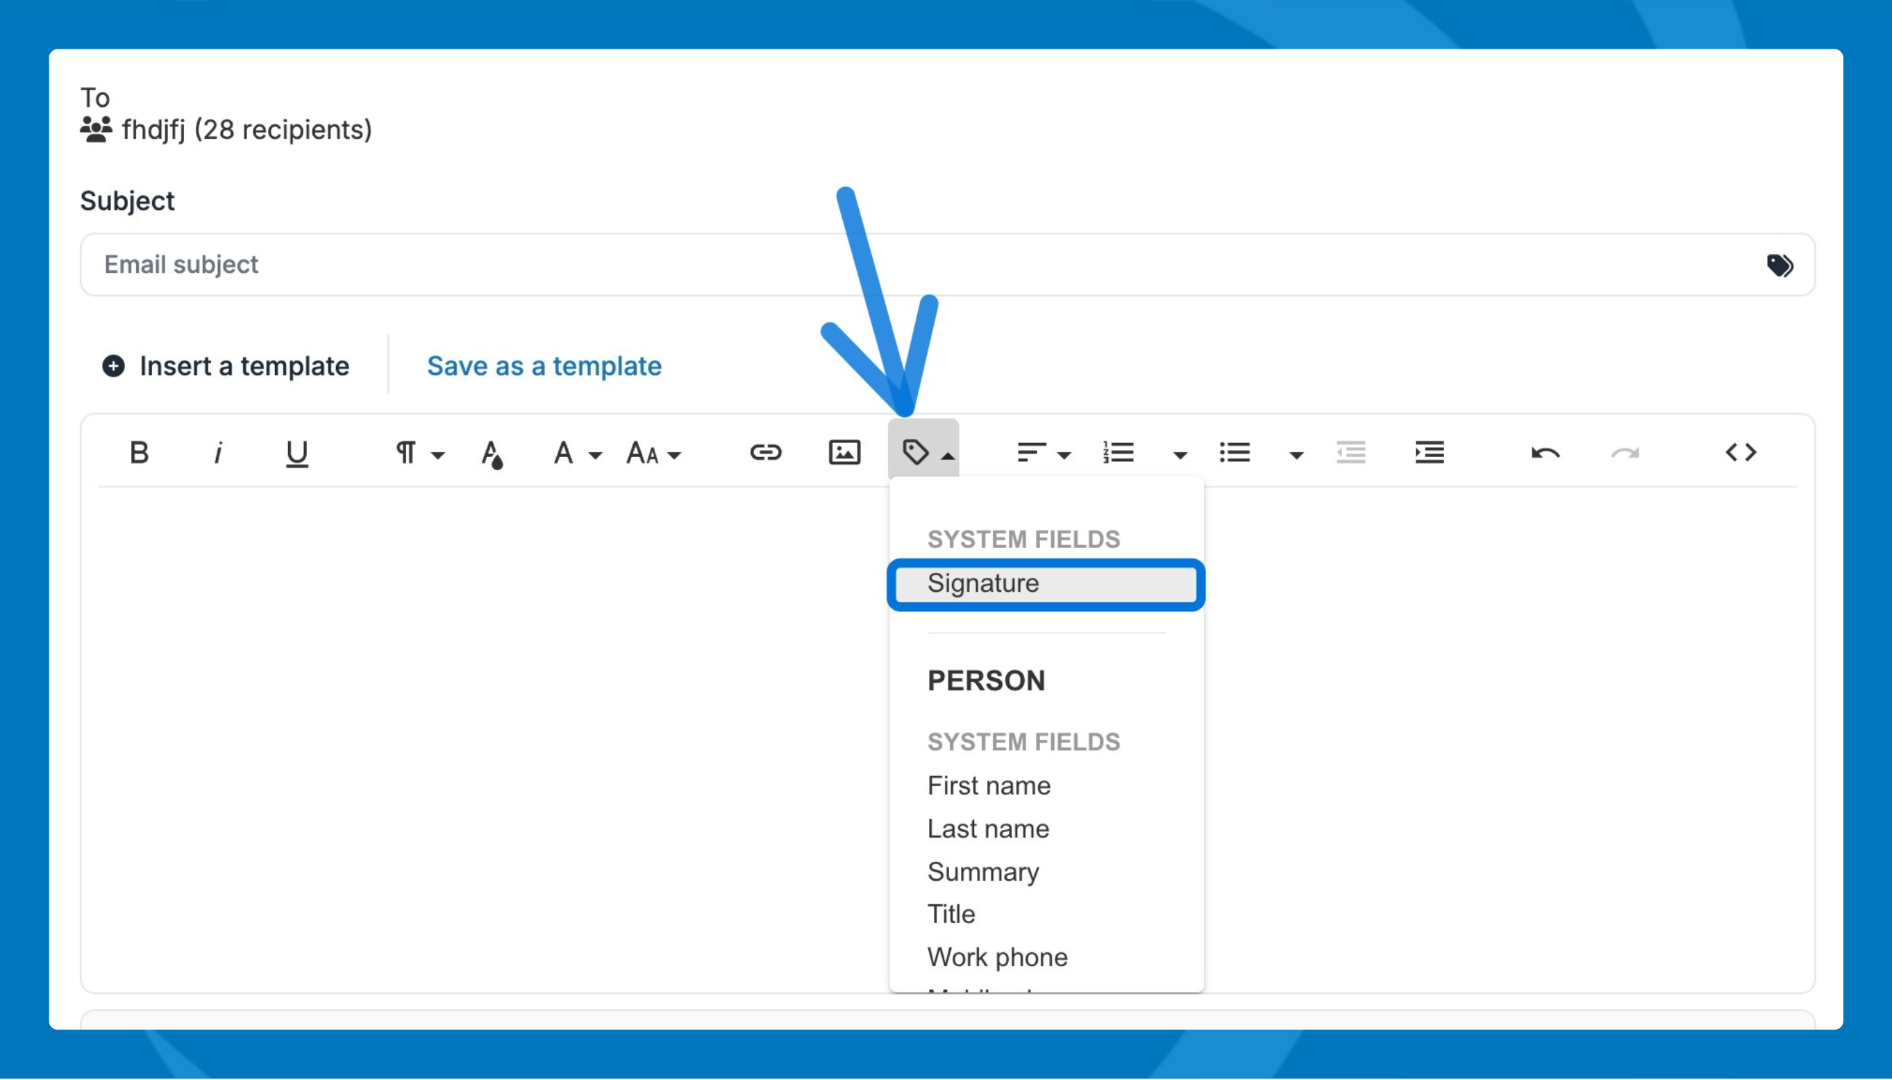
⚠️ Note: For bulk emails or campaigns, you must manually add the Signature merge tag for your signature to populate.
Signature Types
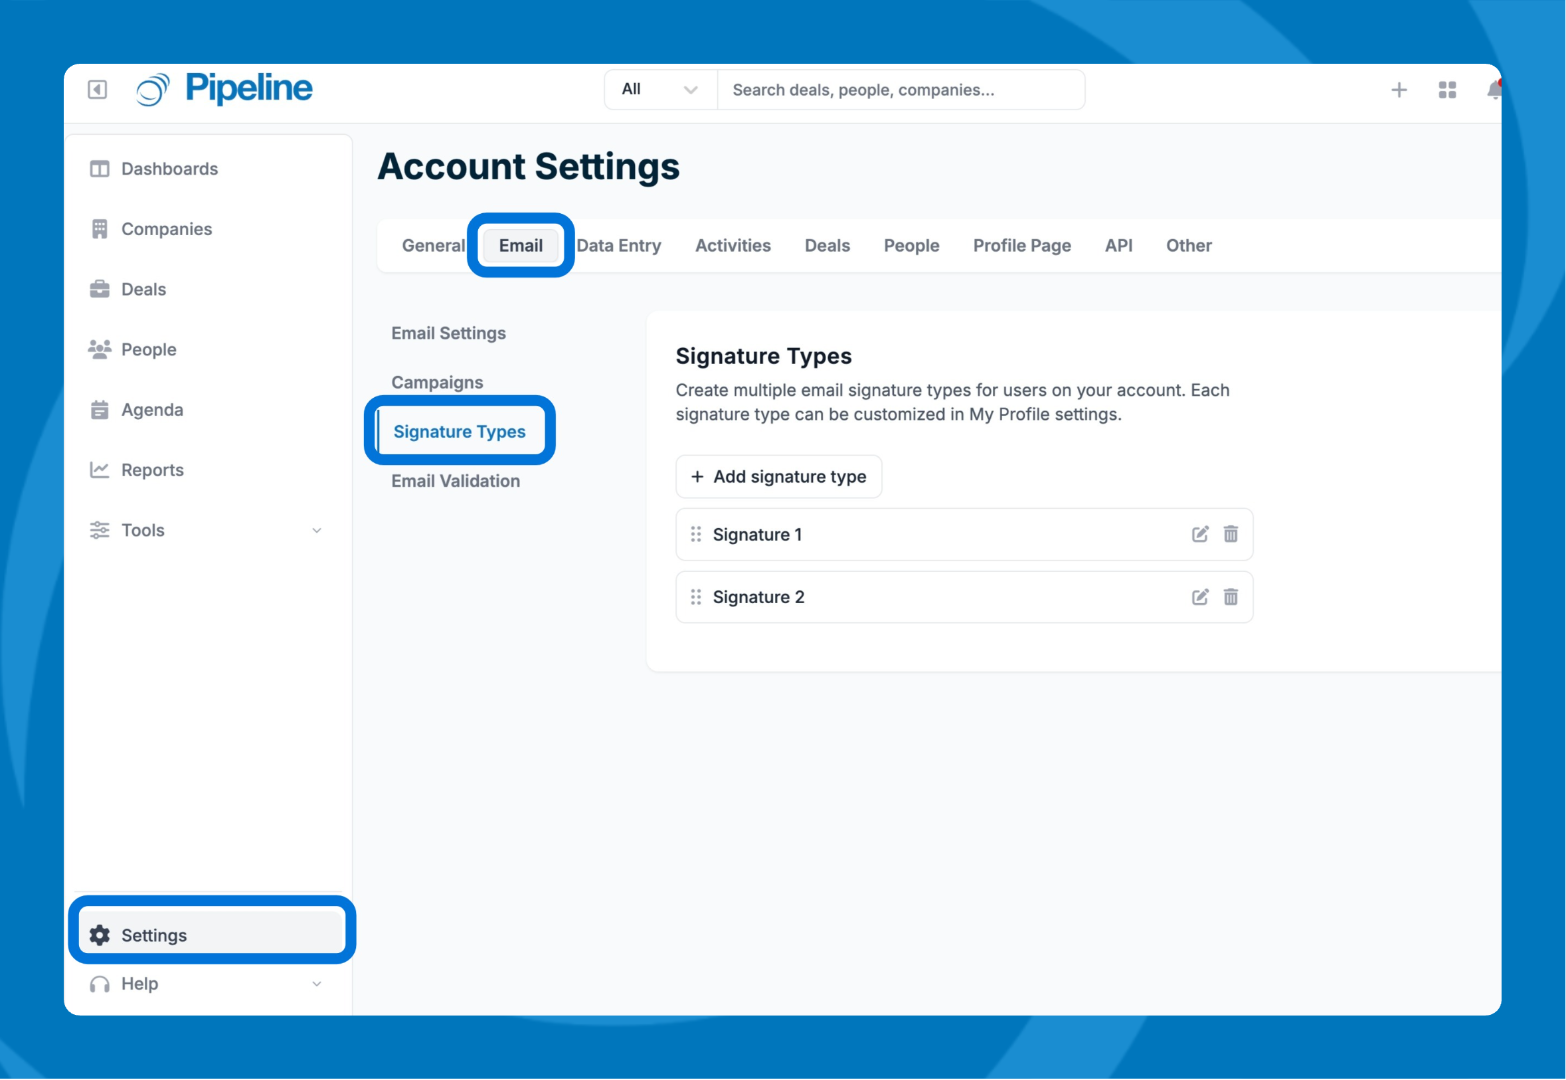
You can use Signature Types to set up different email signatures specifically for use in email campaigns. Only an account admin can create Signature Types. To set them up:
- Go to Settings.
- Click the Email tab.
- Click Signature Types.
- Click the + Signature Type button to add a new type.
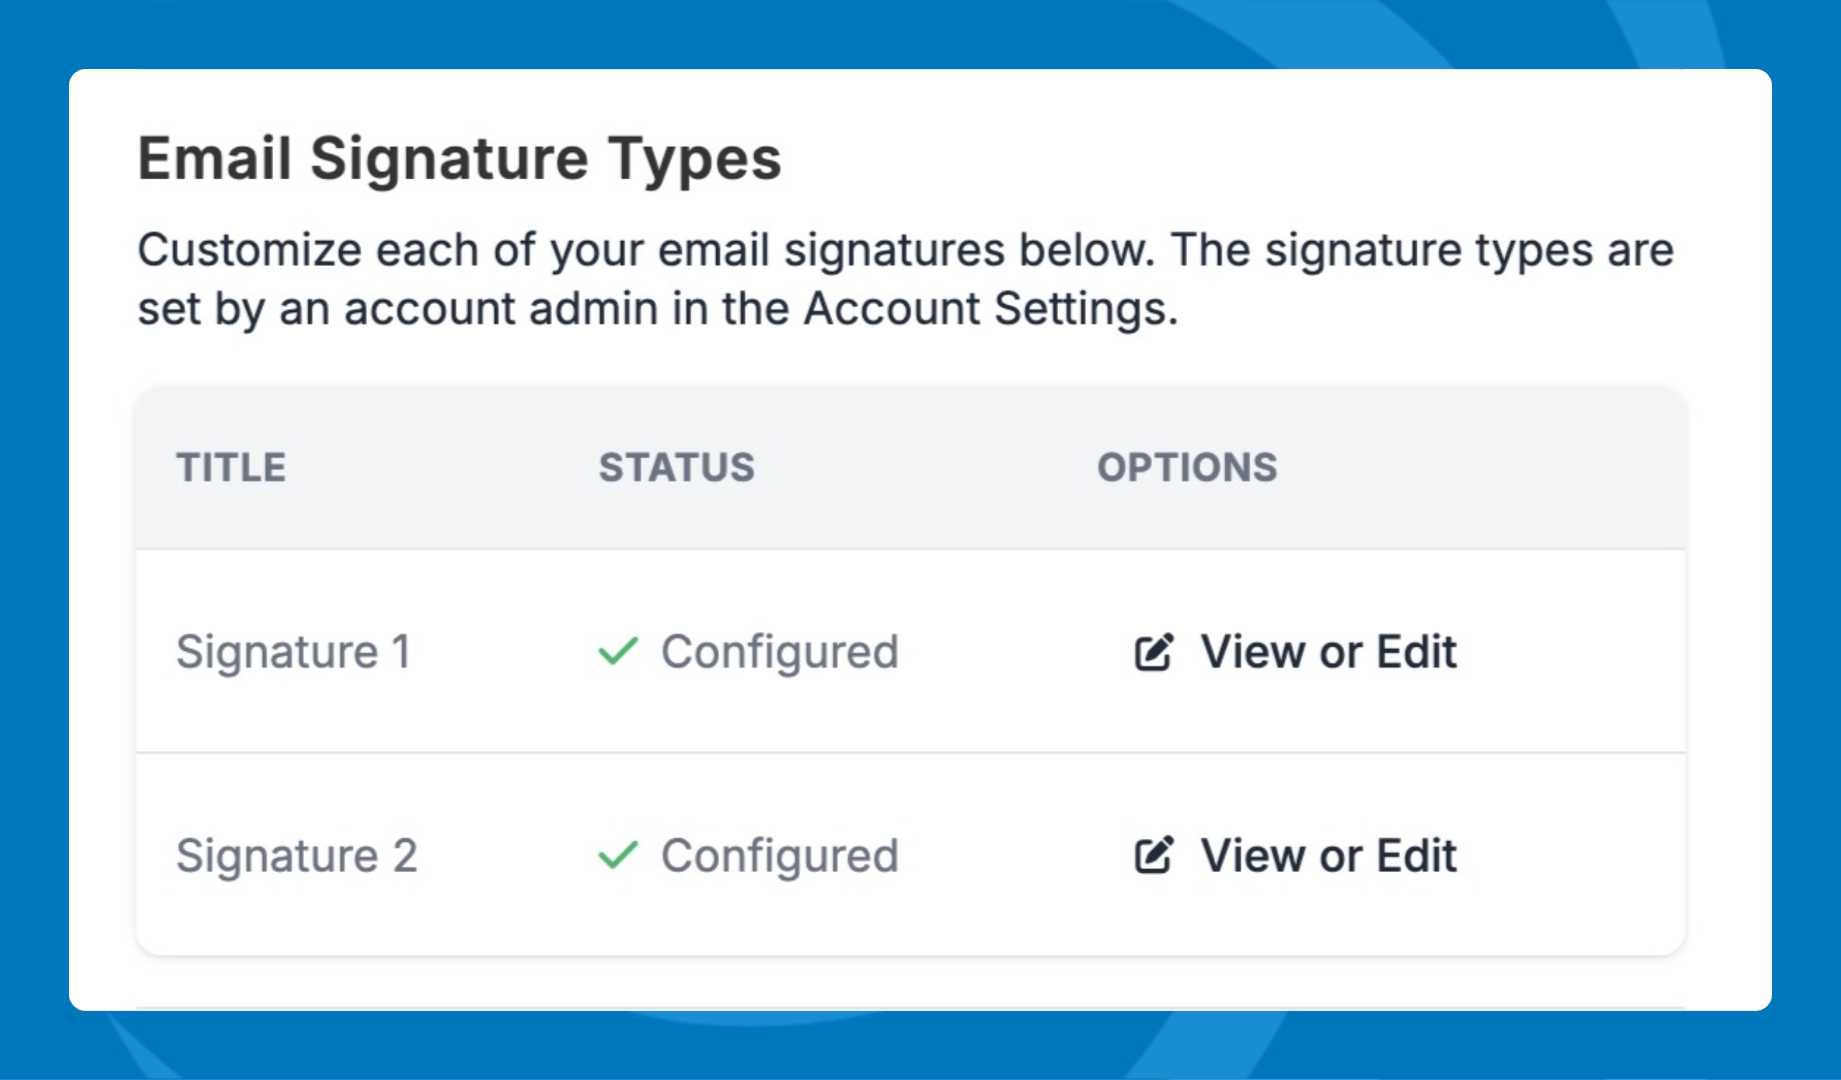
Once Signature Types have been created, each user can customize their own version of each type:
- Go to My Profile.
- Click the Email tab.
- Scroll down to the Email Signature Types section.
- Click View or Edit next to a Signature Type to personalize it.
Need help? Contact support at [email protected].